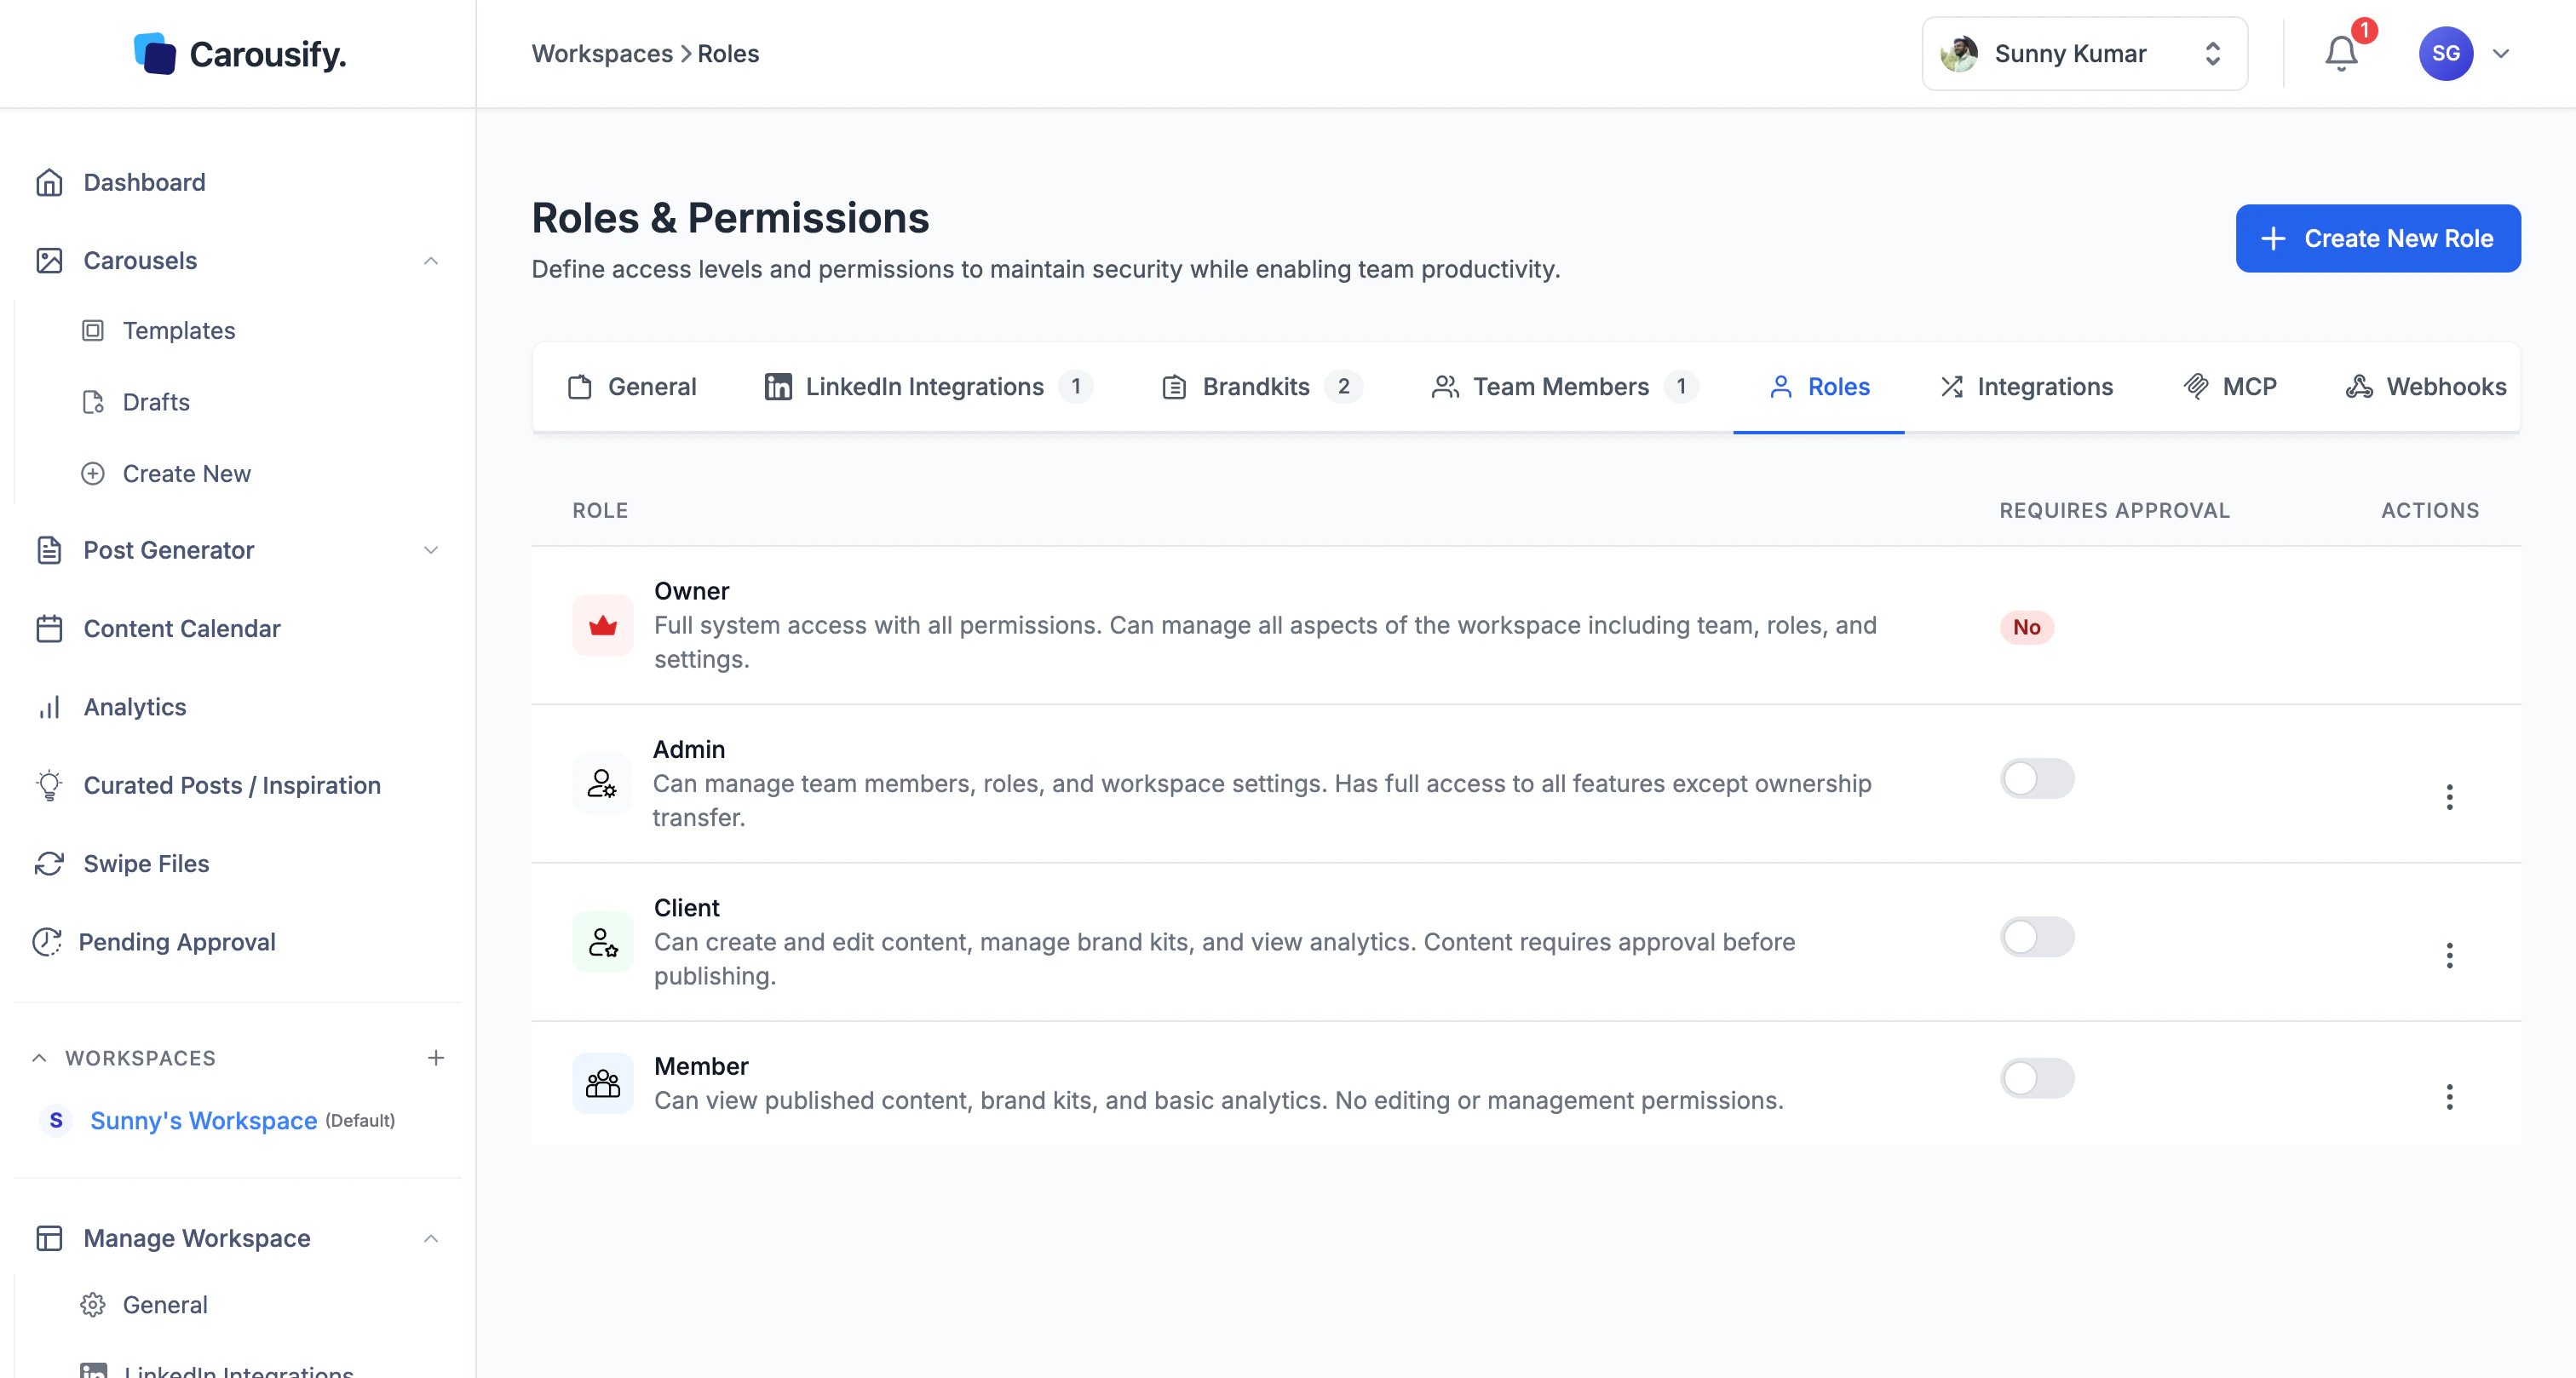
Built-in roles
| Role | What they can do |
|---|---|
| Owner | Full system access. Manages team, roles, billing, and workspace settings. Created automatically with the workspace and can’t be removed. |
| Admin | Everything except ownership transfer — manages team, roles, integrations, brand kits, and content. |
| Member | Creates and edits content, manages brand kits, views analytics. The default for writers, designers, and editors. |
| Client | View-only — sees published content, brand kits, and basic analytics. Can’t create or edit anything. The right role for the brand owner you’re producing for. |
The approval gate
Each role has a Requires Approval toggle on the roles table. Turn it on and any post a member of that role schedules or publishes lands in Pending Approval instead of going live — an Admin or Owner has to sign off first. This is how Carousify’s approval workflow is wired. Requires Approval is off for every role by default — turn it on for the roles you want to gate (typically Member, so writers ship to a queue an Admin signs off on). Client is view-only, so the toggle has no effect there. Toggle it from the roles table any time. The change applies to future posts — anything already scheduled keeps its existing approval state.Create a custom role
If the four built-ins don’t fit, click Create New Role in the top right.
Pick an icon
Choose from admin, editor, approver, viewer, analyst, manager, contributor, or guest. Purely cosmetic — shows up next to the role on the team list.
The permission checklist
Show advanced opens five permission groups: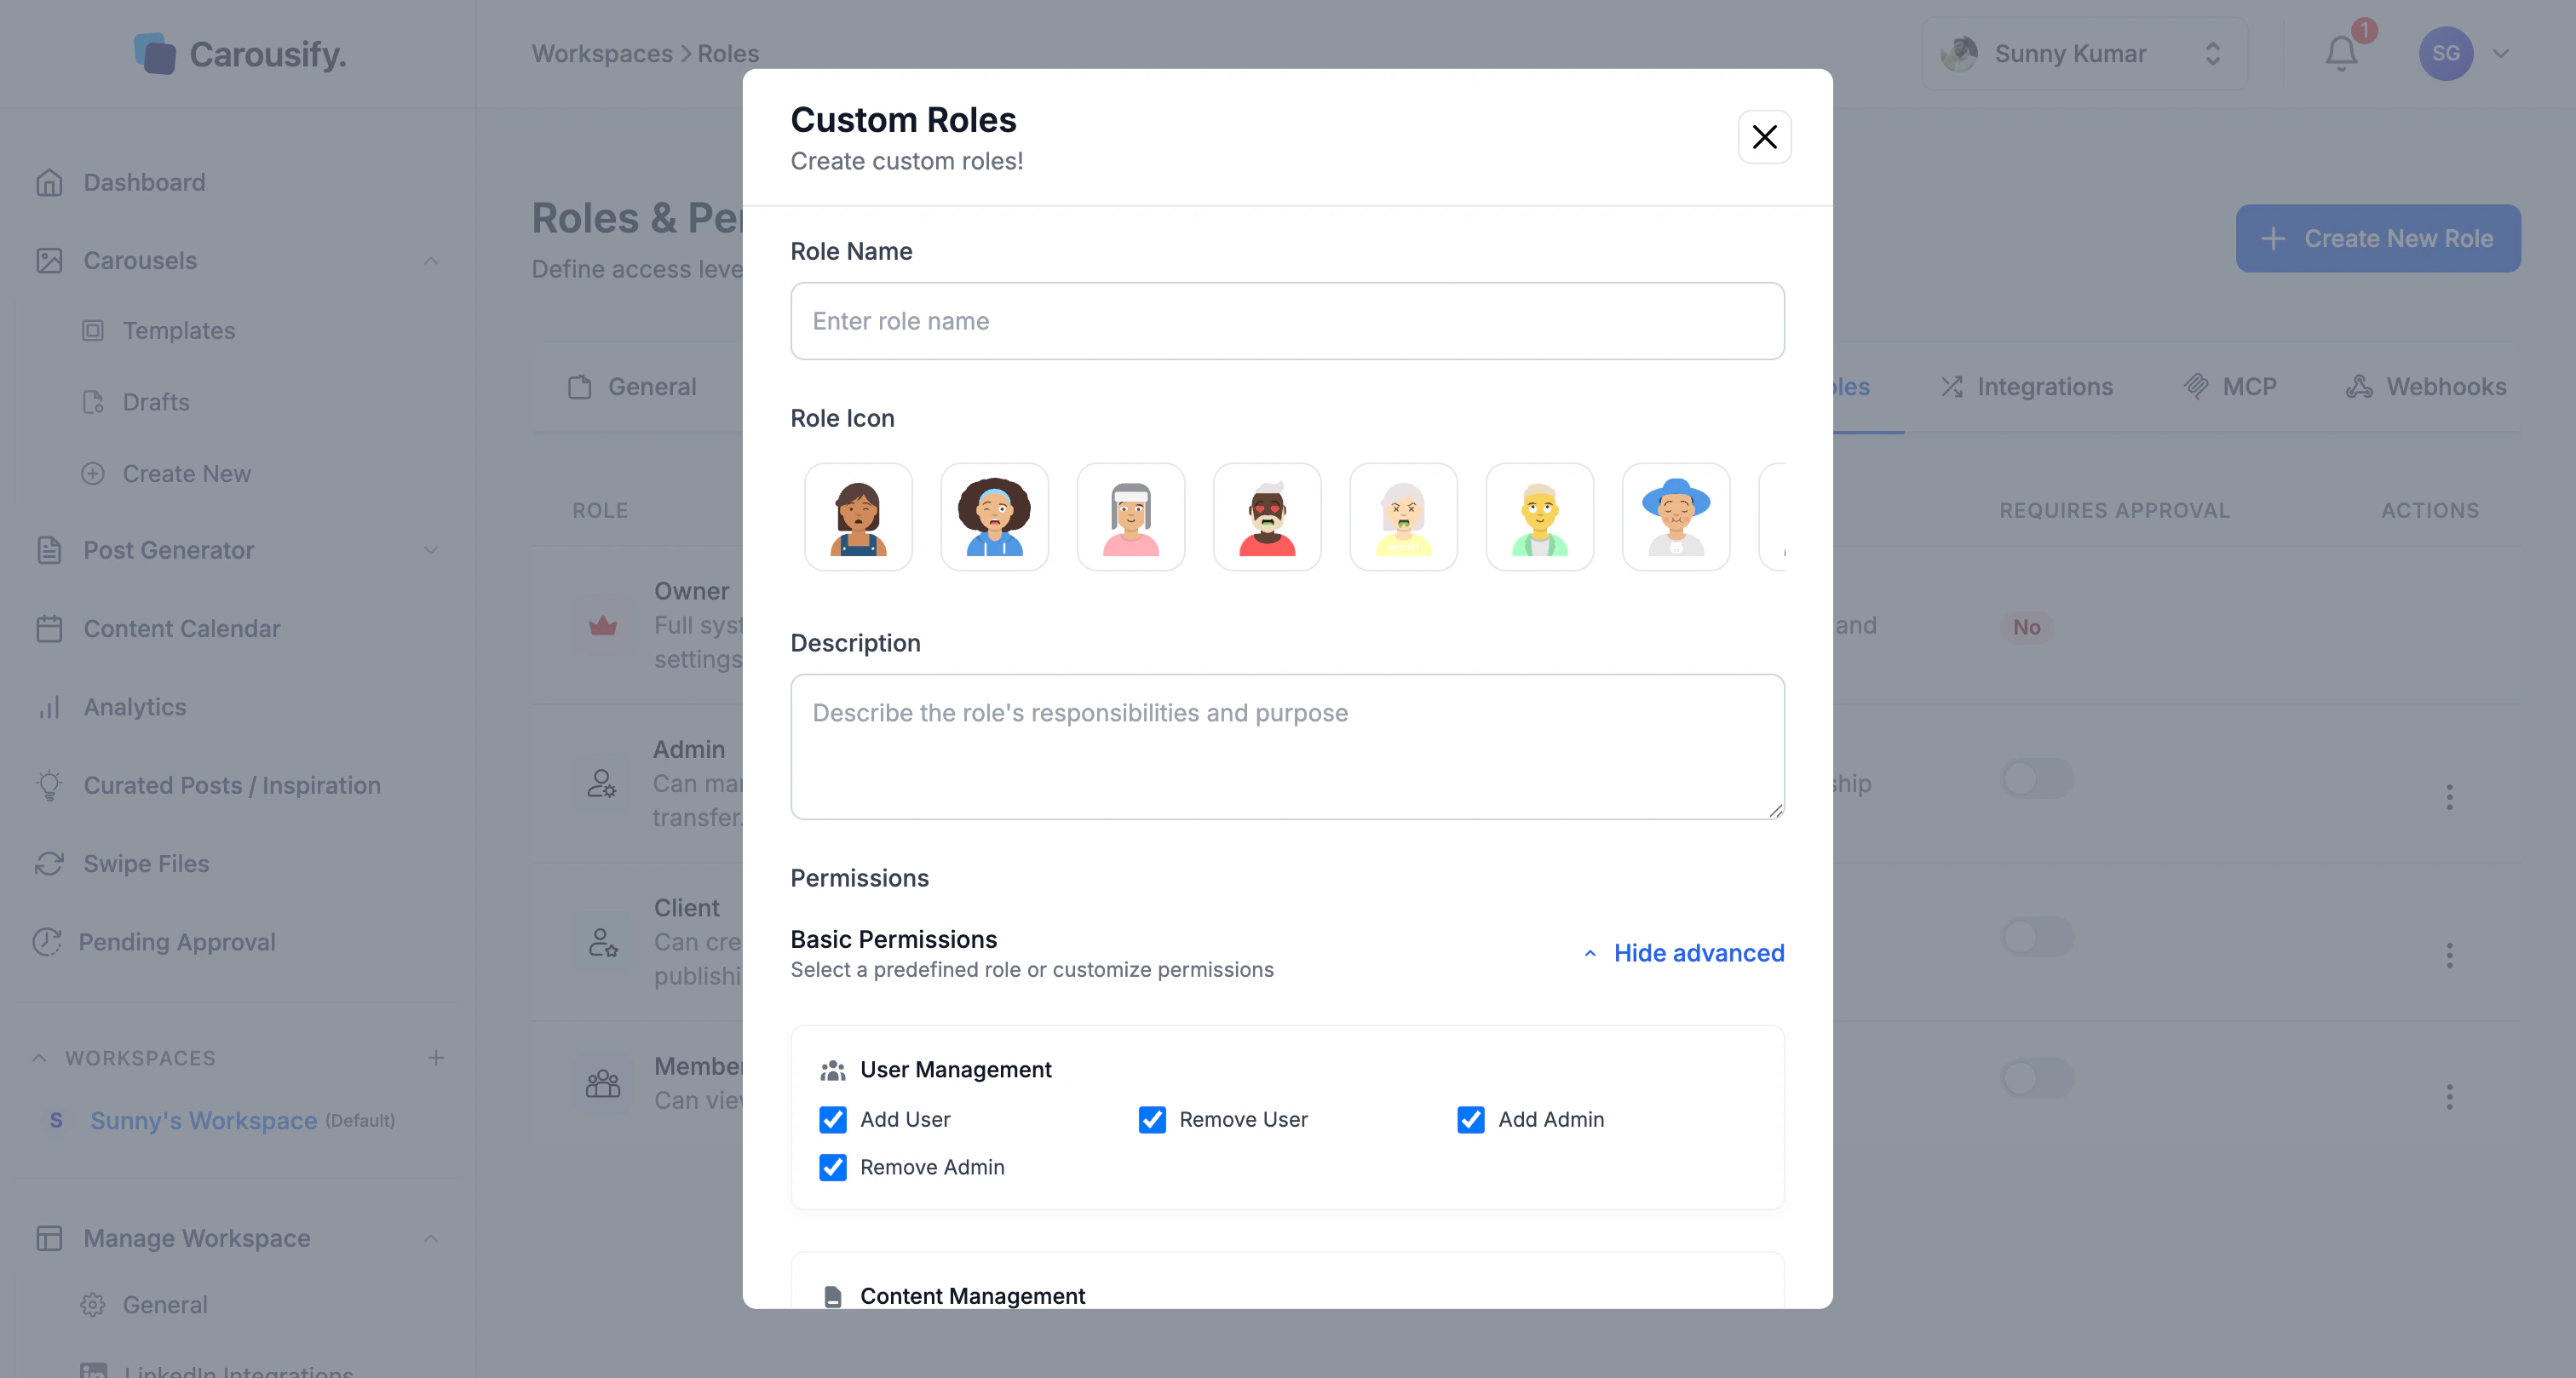
| Group | Permissions |
|---|---|
| User Management | Add User, Remove User, Add Admin, Remove Admin |
| Content Management | Schedule Post, Publish Post, View Scheduled Posts, View Published Posts, Approve Posts, Edit Drafts, Add Clients |
| Integrations | Add LinkedIn, Remove LinkedIn |
| Templates | Create Template, Edit Template, Delete Template |
| Brand & Workspace | Modify Workspace, Delete Workspace, Add Brand Kit, Edit Brand Kit |
Edit or delete a role
Each role row has an Actions menu. Built-in roles can have their Requires Approval toggle changed but their permission set is fixed. Custom roles can be edited, duplicated, or deleted from the same menu.What’s next
Invite team members
Send invites and assign one of these roles.
Approval workflow
How Requires Approval routes posts through Pending Approval.
Manage clients
Run a workspace for a client without sharing logins.
Workspace overview
Where roles fit alongside brand kits, integrations, and members.