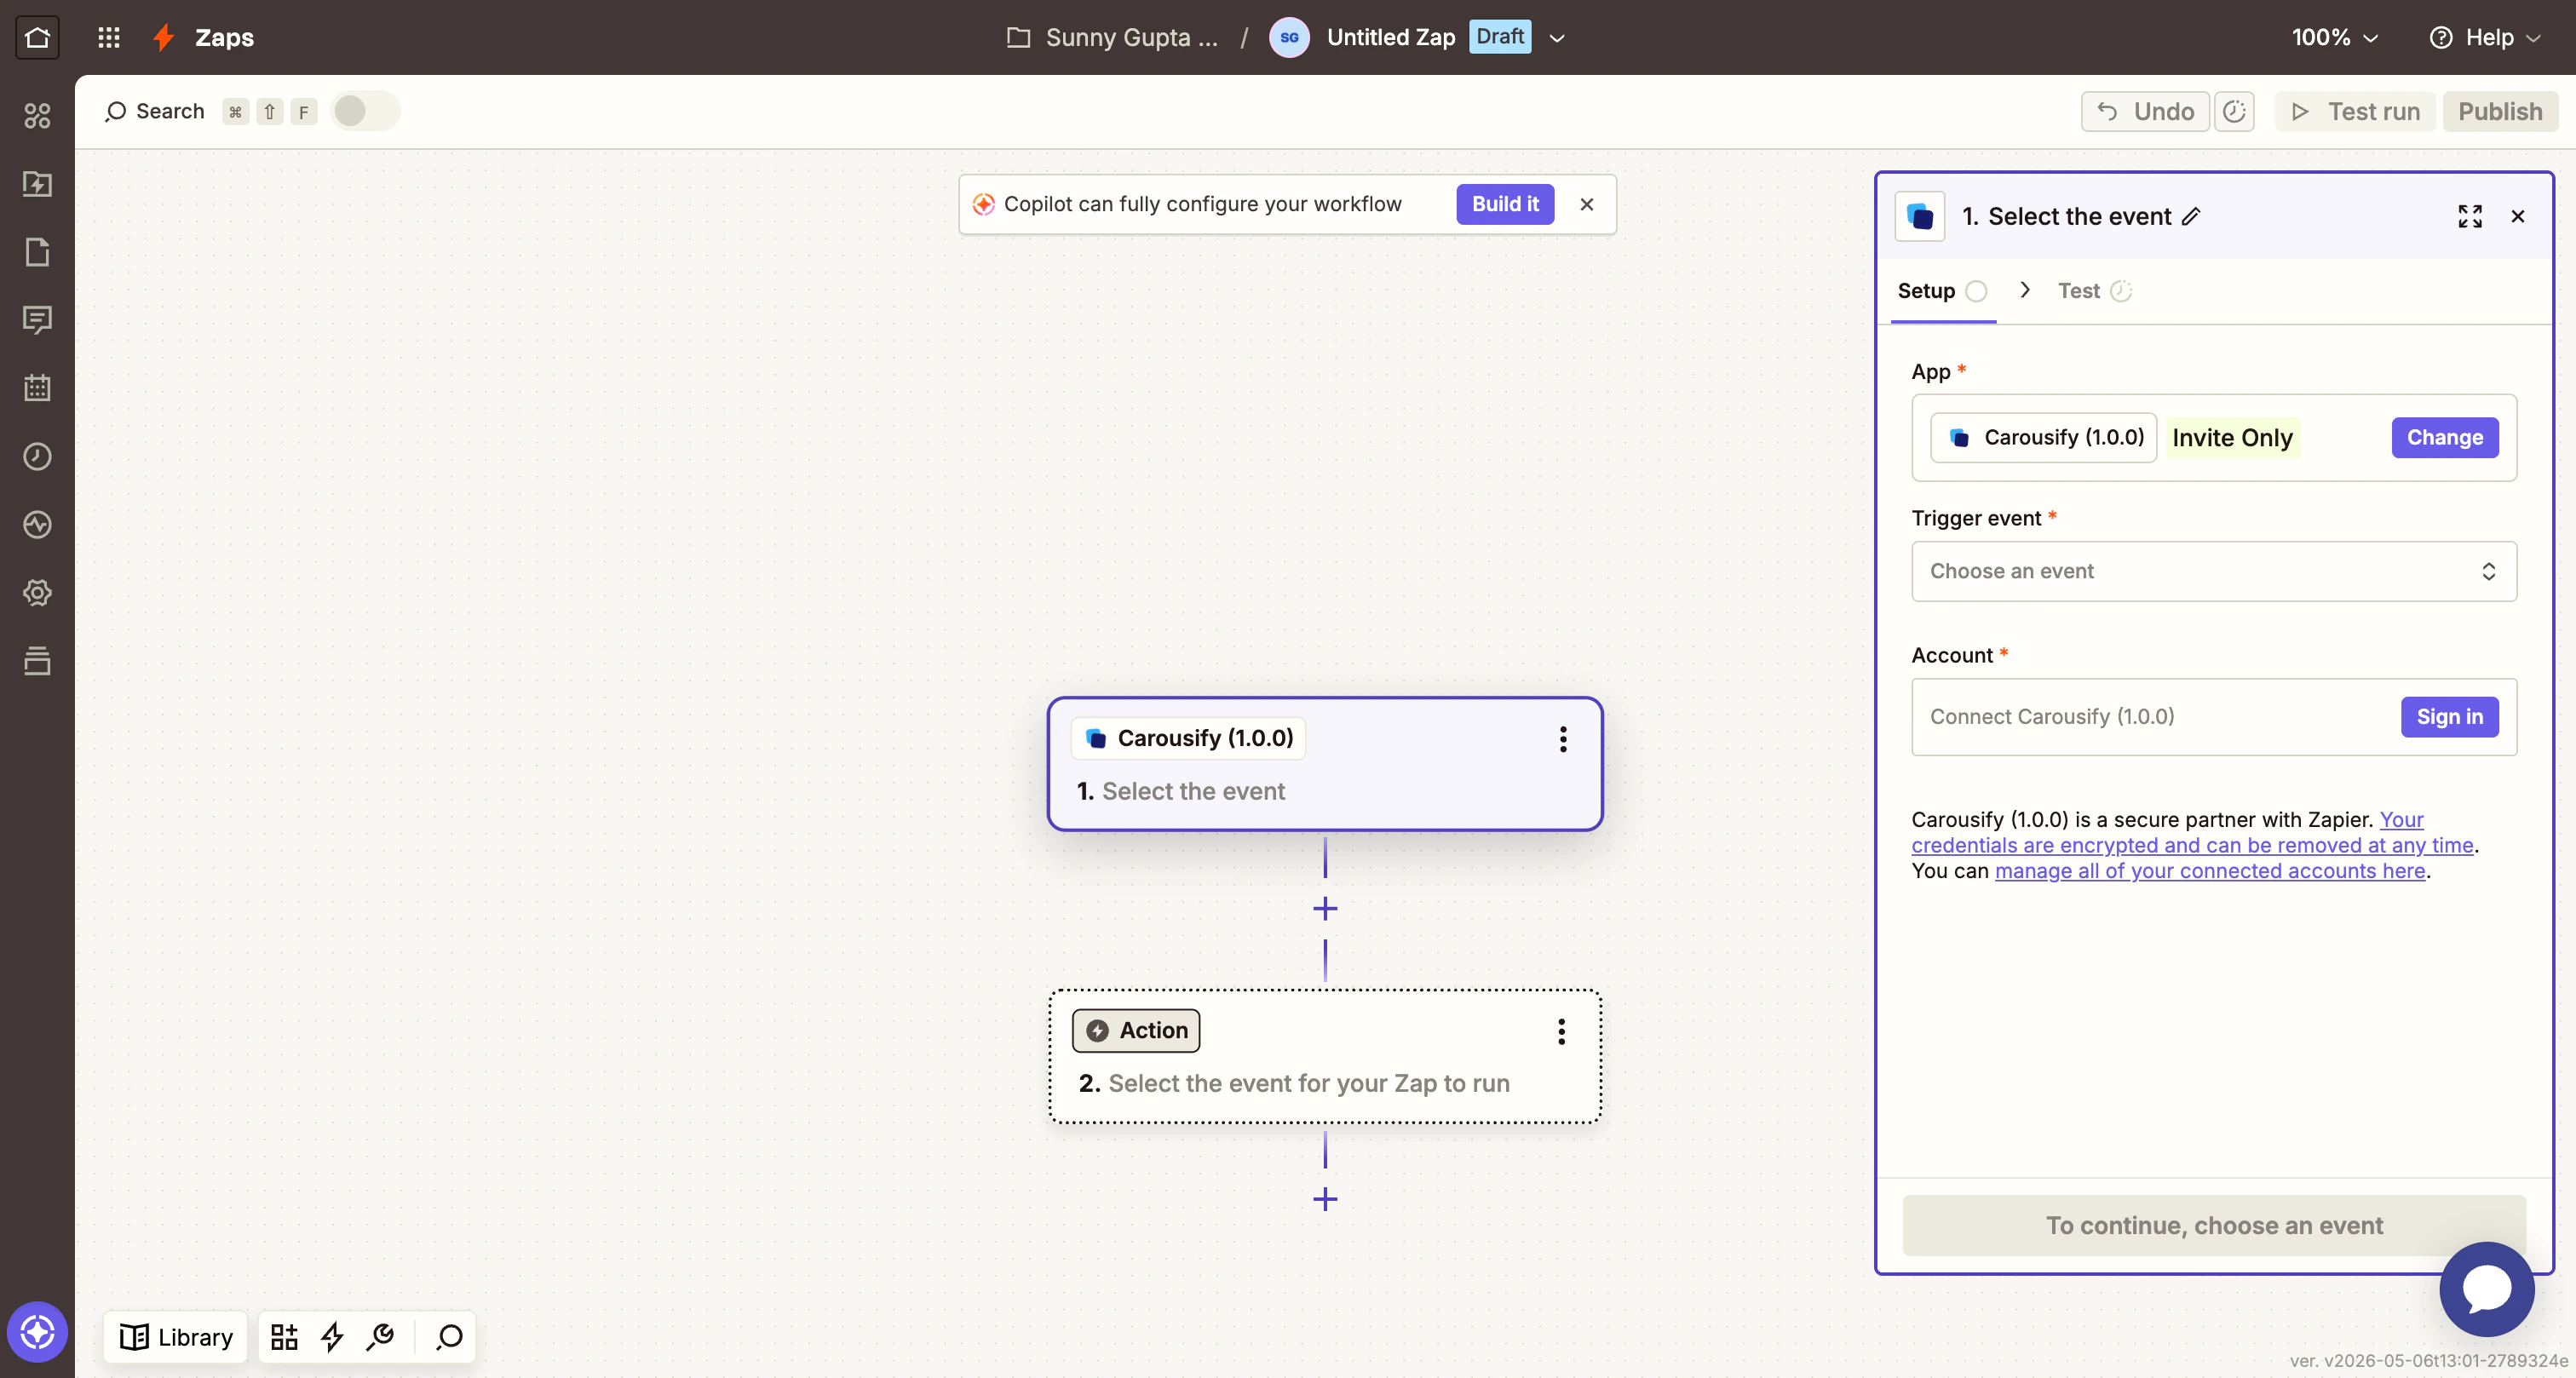
Carousify on Zapier is currently invite-only — you’ll use a public invite link to install the integration on your Zapier account. Once you’ve accepted, every Zap you build with Carousify behaves exactly like a publicly-listed app.
What you can build
A few of the most common Zaps teams set up on day one:| Use case | Trigger | Action |
|---|---|---|
| Log every published post for client reports | Post Published | Google Sheets — Create Spreadsheet Row |
| Alert a Microsoft Teams channel on publish failures | Post Publishing Failed | Microsoft Teams — Send Channel Message |
| Append scheduled posts to a content calendar | Post Scheduled | Airtable — Create Record |
| SMS the team when a high-priority client’s post fails | Post Publishing Failed (filtered by Account) | Twilio — Send SMS |
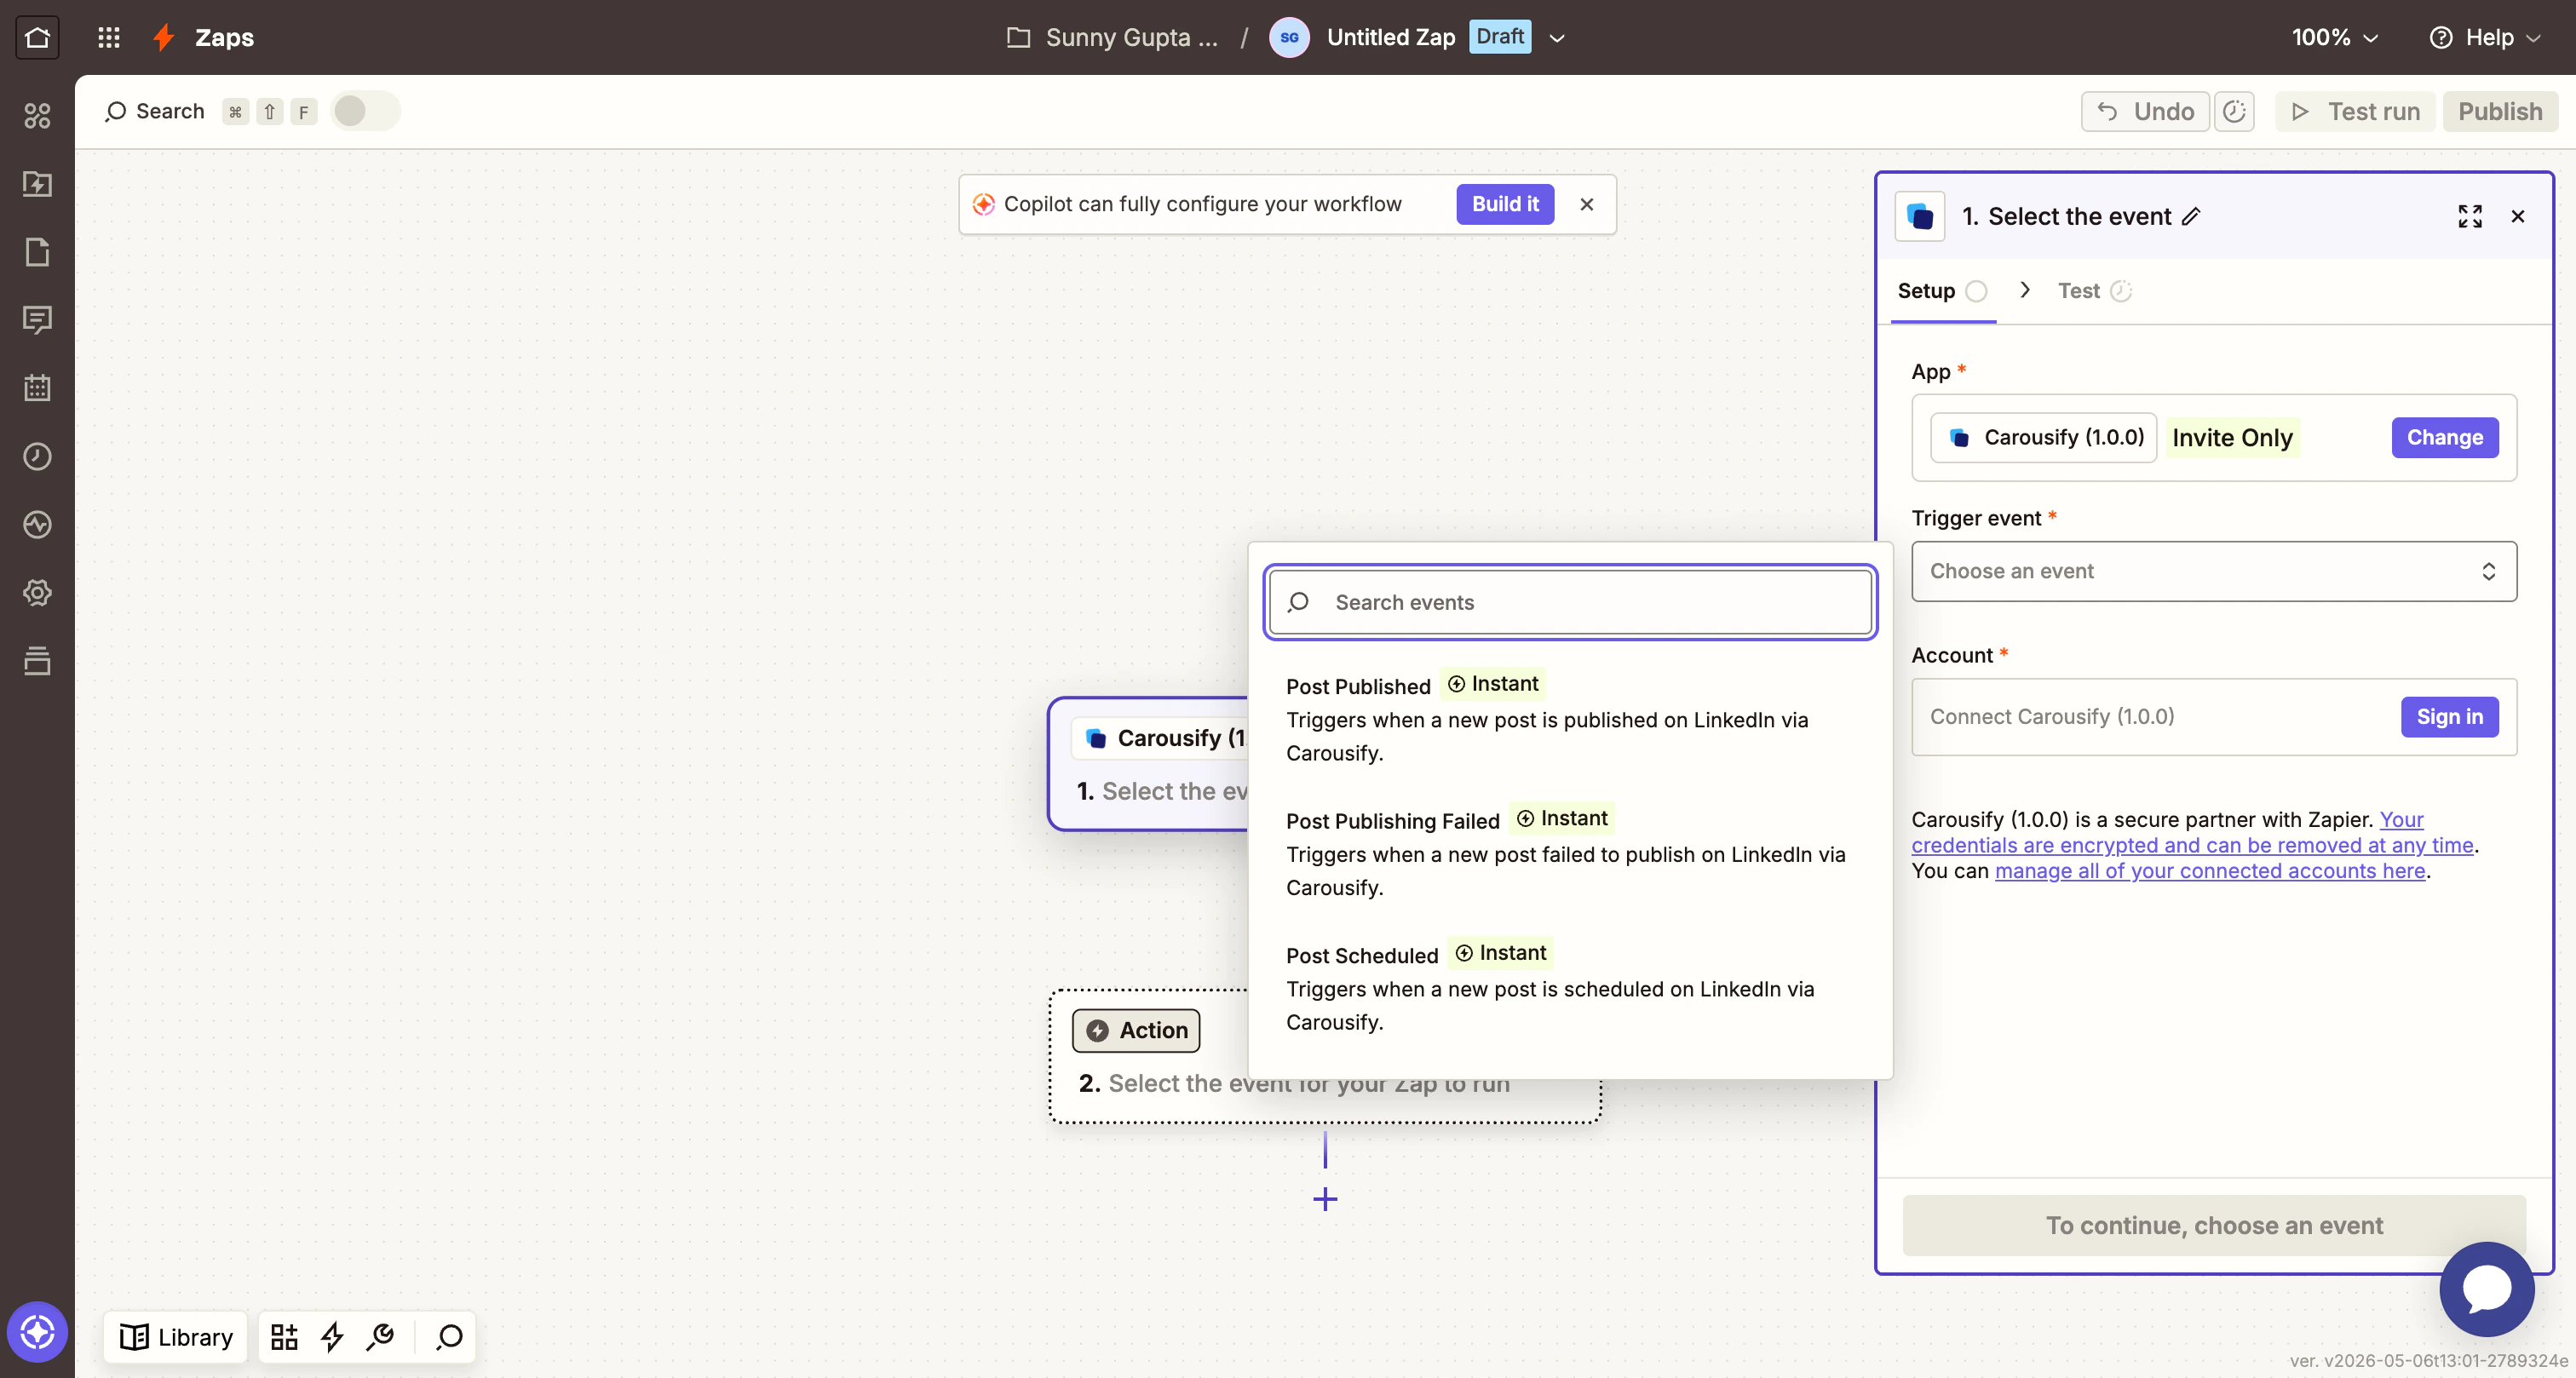
Triggers
Carousify exposes three instant triggers:| Trigger | Fires when |
|---|---|
| Post Published | A post goes live on LinkedIn (instant or scheduled). |
| Post Scheduled | A post is queued for a future date and time. |
| Post Publishing Failed | LinkedIn rejected the post or auth expired before publishing. |
Trigger payload
Every event sends the same shape so you can map fields consistently across Zaps. Here’s the reference:| Field | Type | Notes |
|---|---|---|
Event | string | post.published, post.scheduled, or post.failed. |
Timestamp | unix ms | When the event fired. |
Data Id | string | The internal Carousify post ID. |
Data Workspace Id | string | Which workspace the post belongs to. |
Data User Id | string | The Carousify user who created the post. |
Data Account Type | string | profile or pages. |
Data Account Id | string | LinkedIn vanity name of the account/page (e.g. carousify). |
Data Content | string | The post body text. |
Data Title | string (optional) | Post title, if you set one. Often empty. |
Data Media | array (optional) | URLs of images/videos attached to the post. |
Data Status | string | scheduled, published, failed. |
Data Post Urn | string (optional) | LinkedIn URN once published — useful as a stable identifier. |
Data Utm Campaign | string (optional) | UTM tag if link tracking was on. |
Data Posting Time | ISO 8601 | When the post is/was scheduled to publish. |
Data Created At | ISO 8601 | When the post record was created in Carousify. |
Data Updated At | ISO 8601 | Last modification timestamp. |
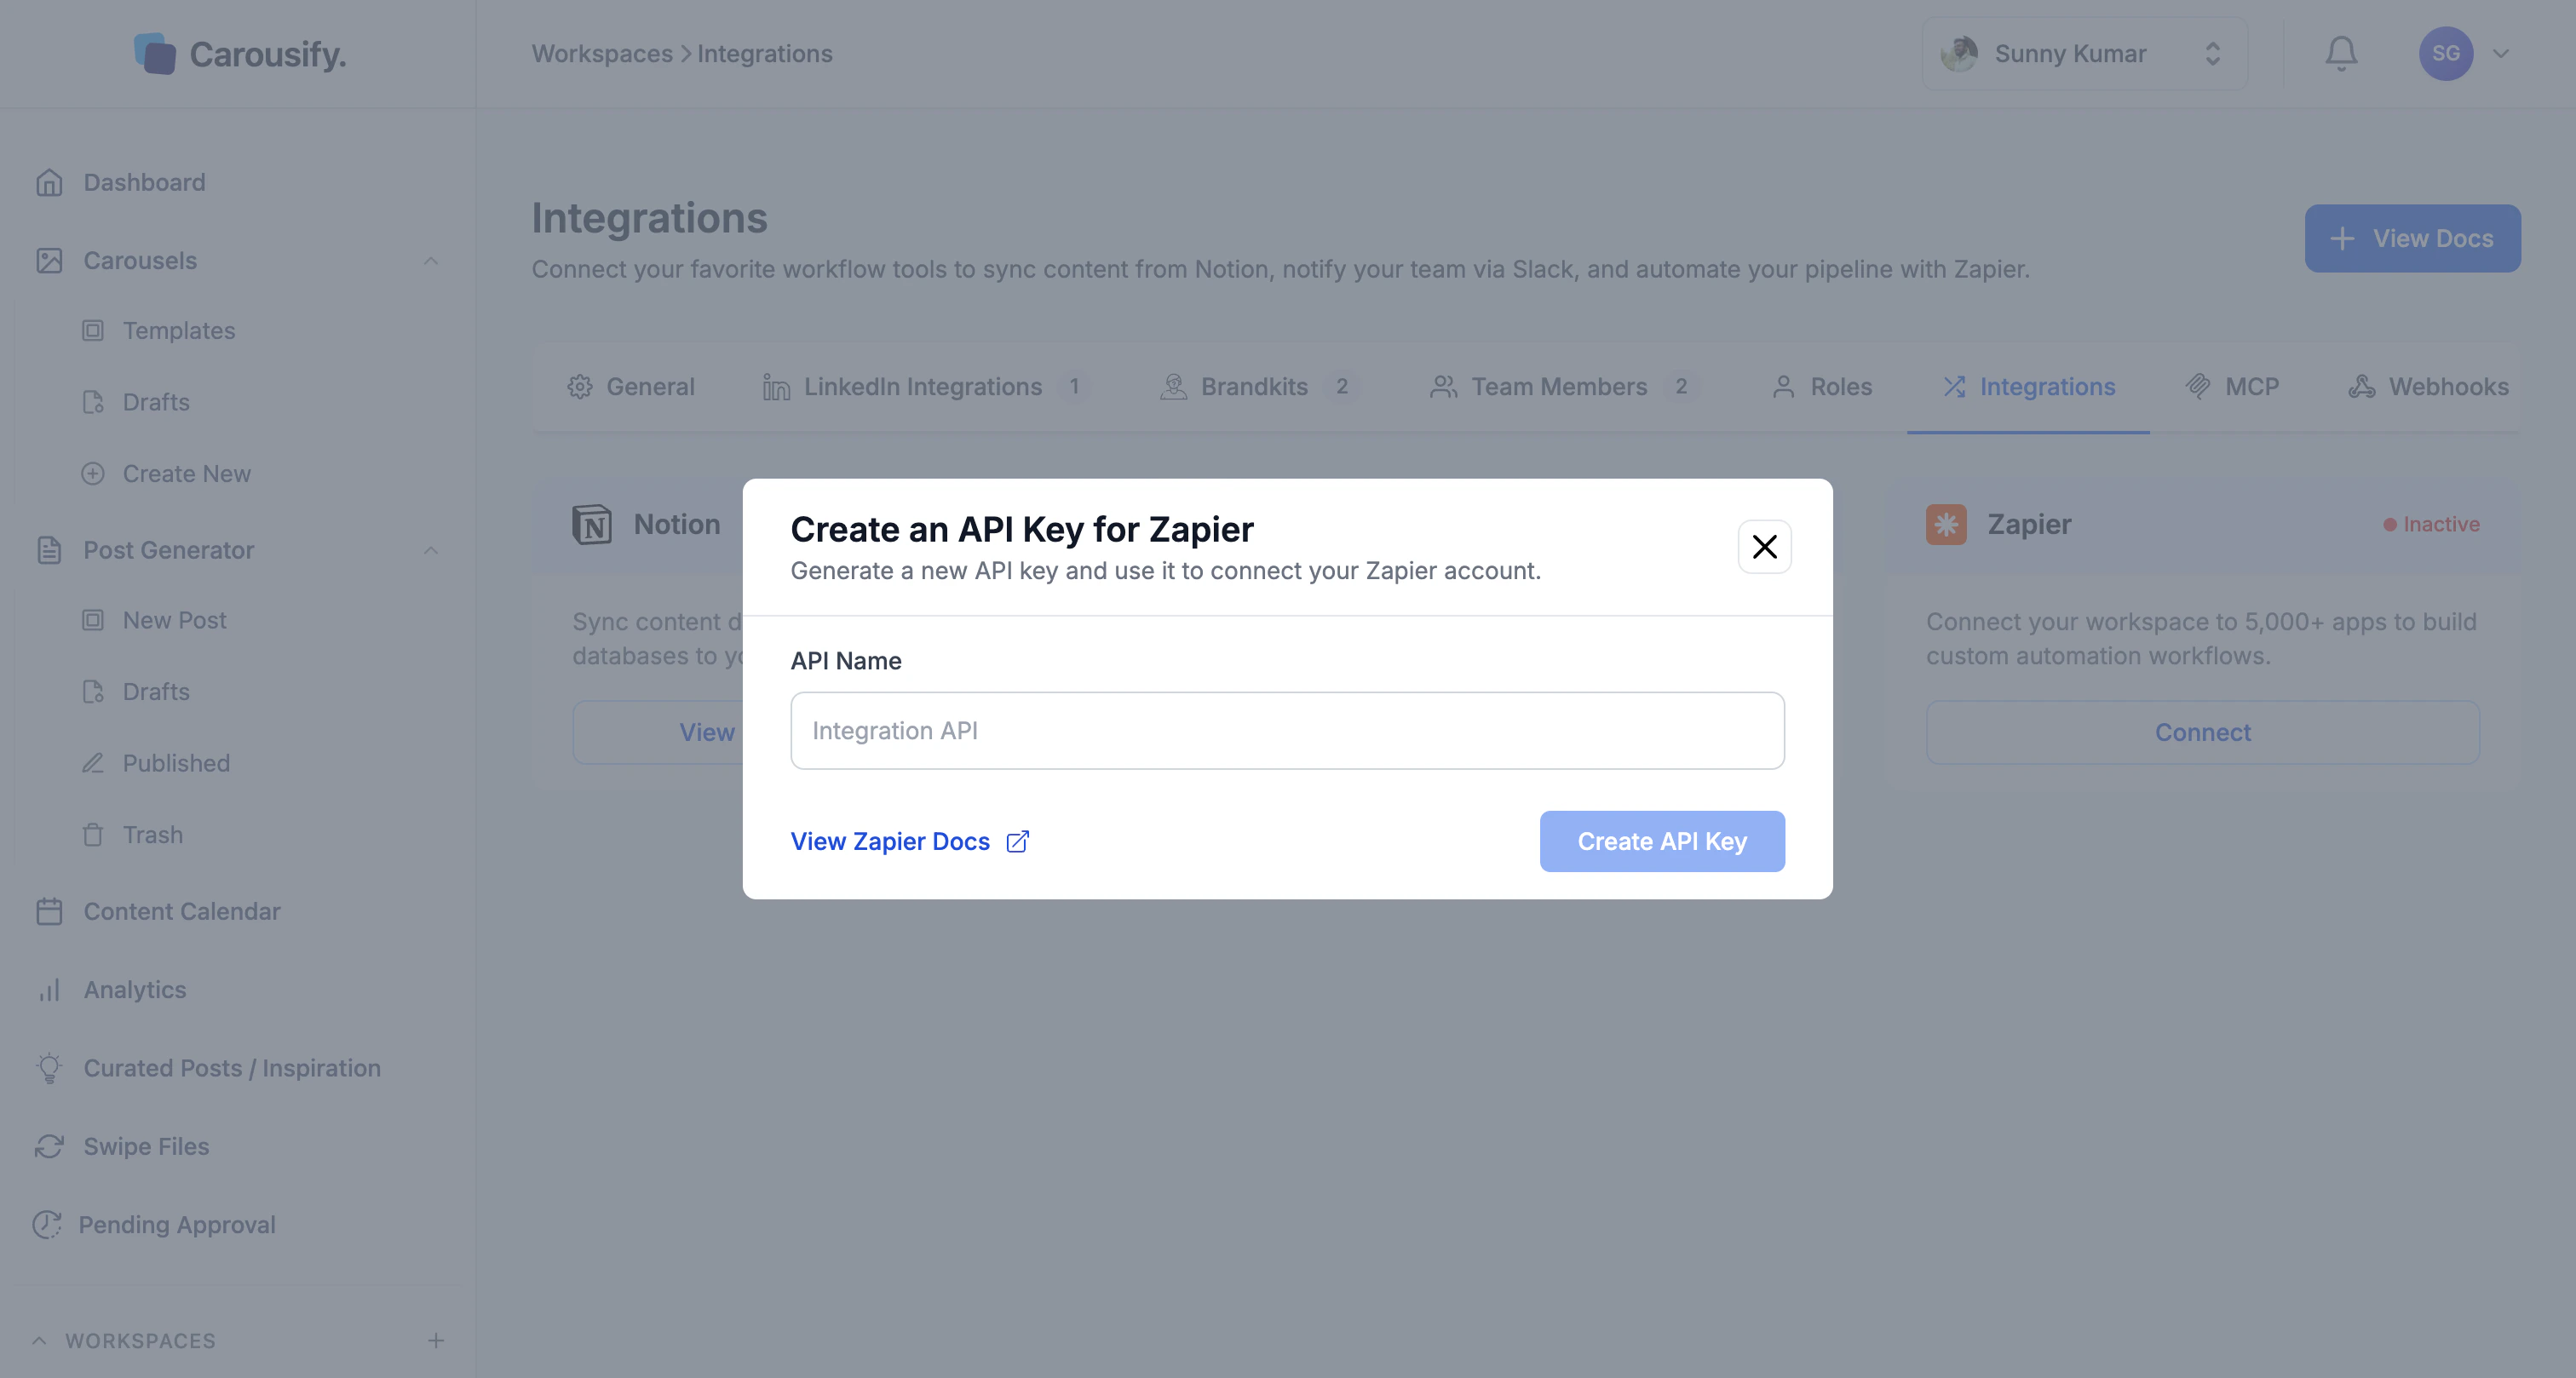
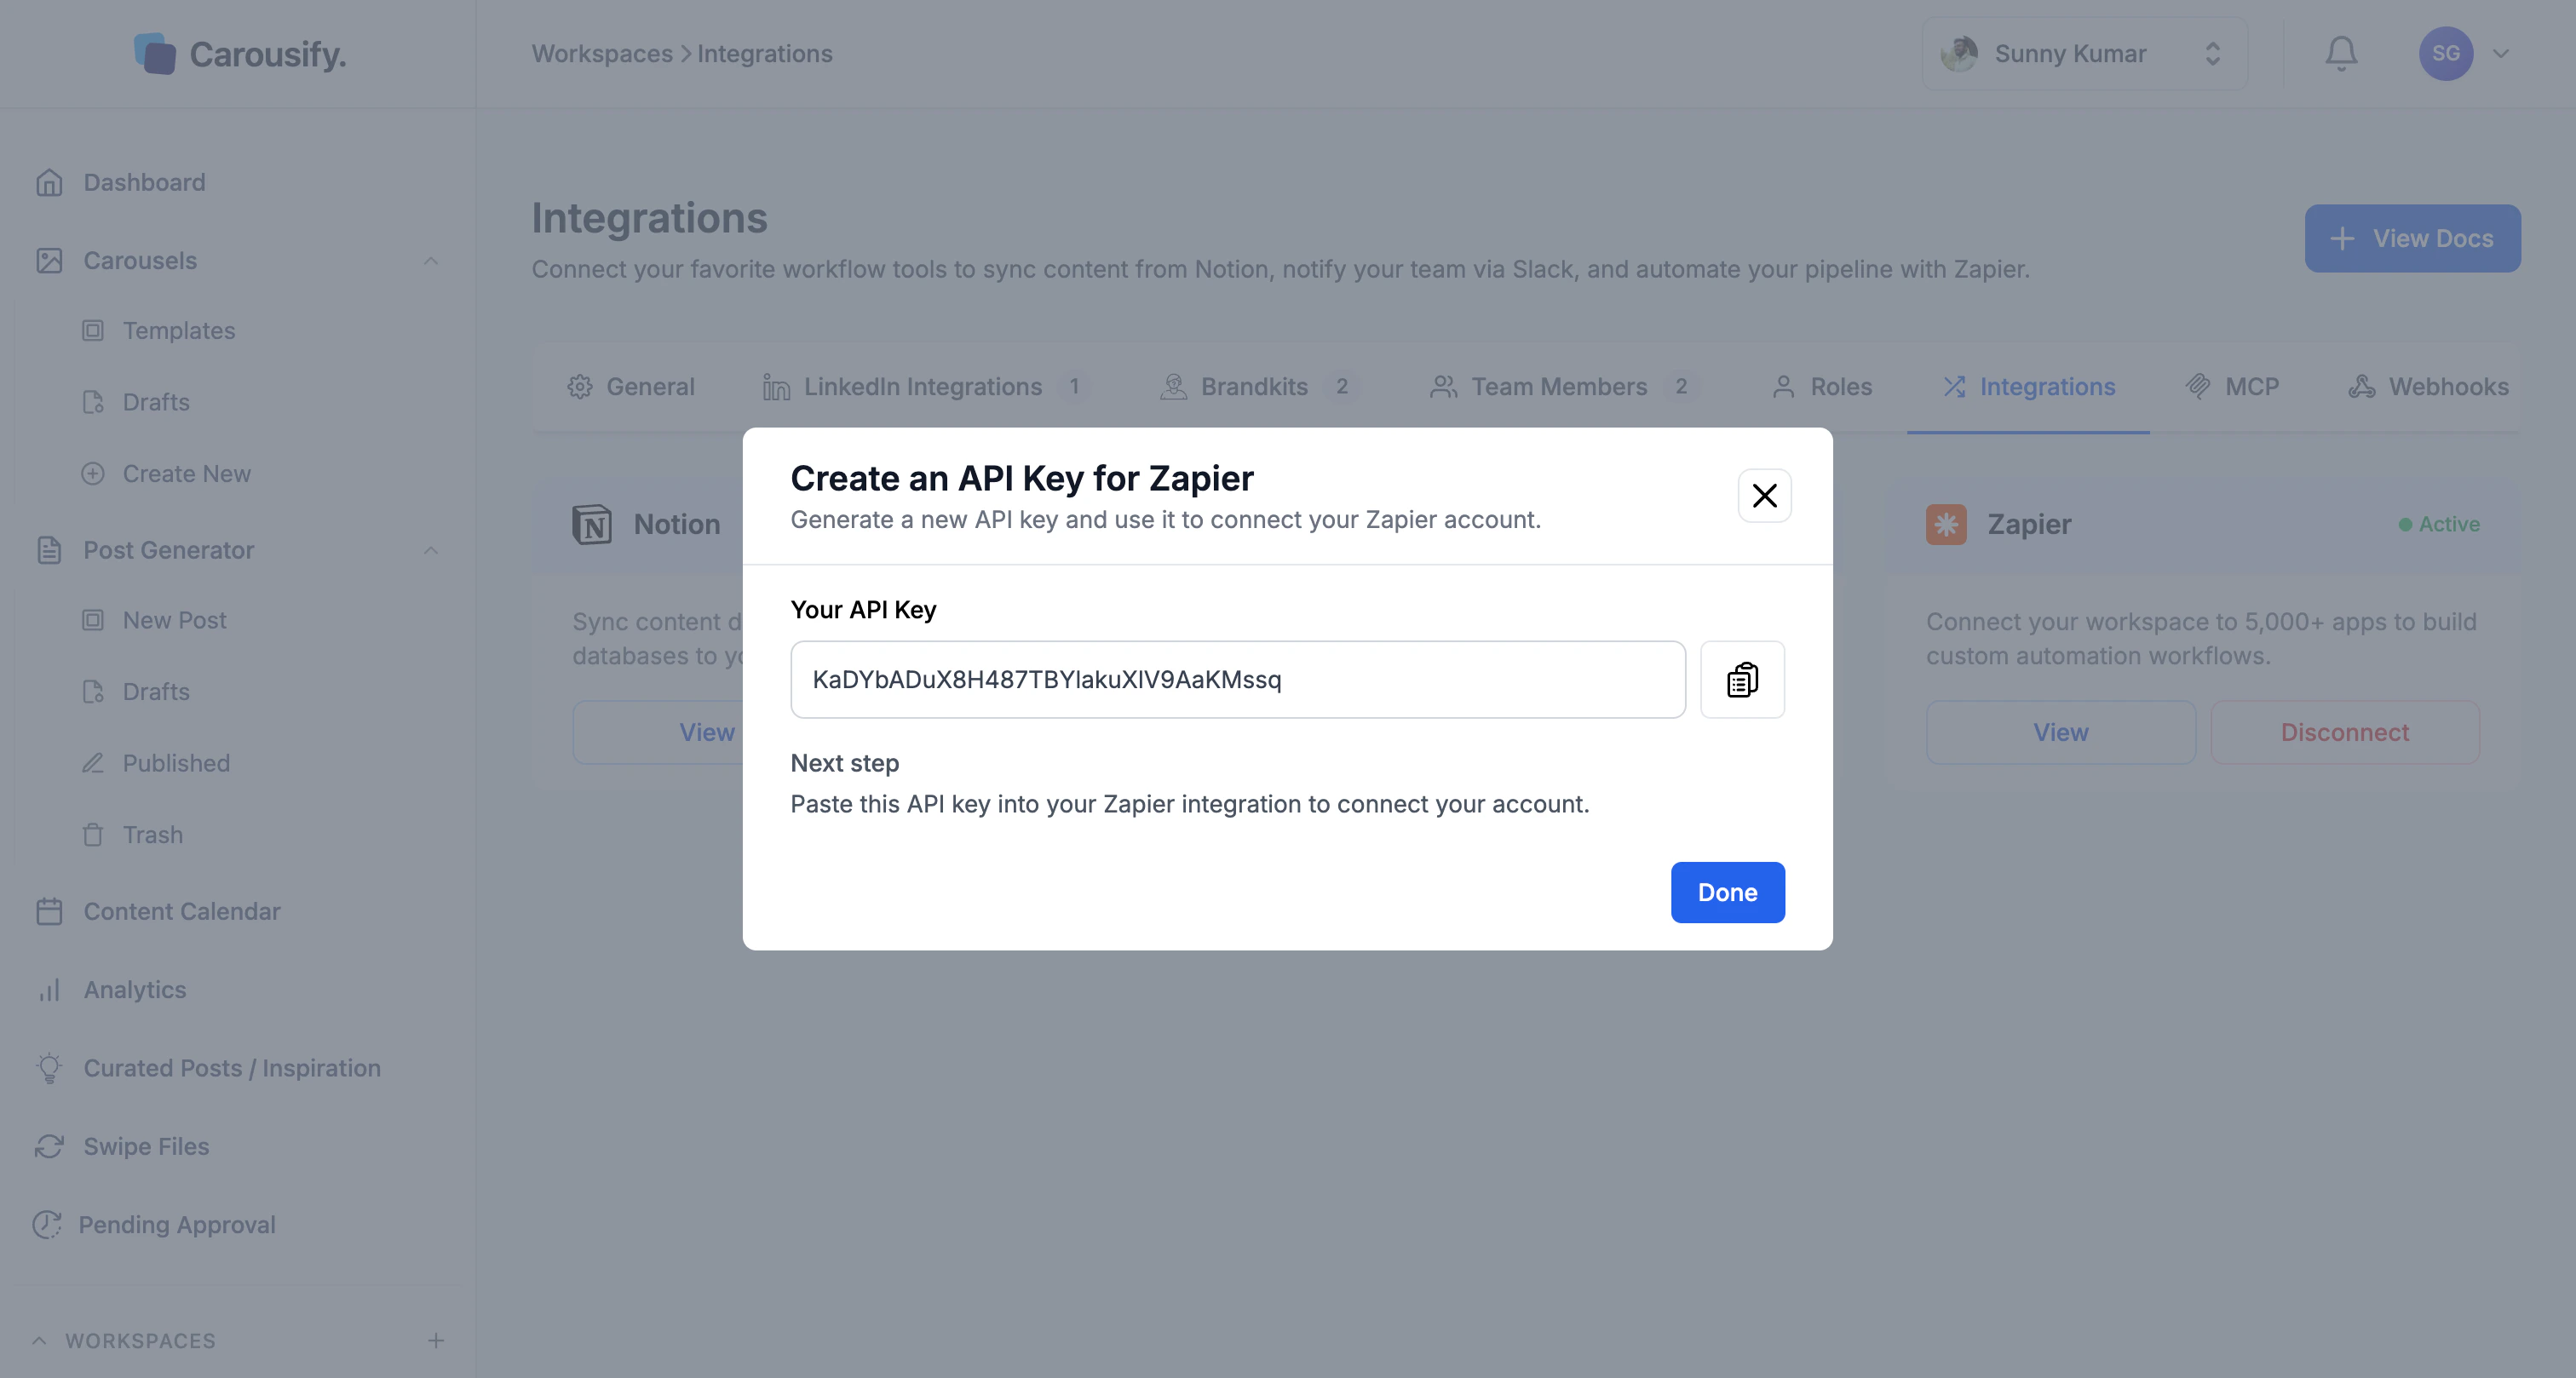
Step 1 — Generate a Carousify API key
In Carousify, go to Manage Workspace › Integrations and click Connect on the Zapier card. Give the key a name you’ll recognise later (e.g.Carousify Zapier) and click Create API Key.
Step 2 — Accept the public invite
Open the Carousify-on-Zapier invite in a new tab: zapier.com/developer/public-invite/240907/e0a7c942dc2c8d7f5c376a77233141a0/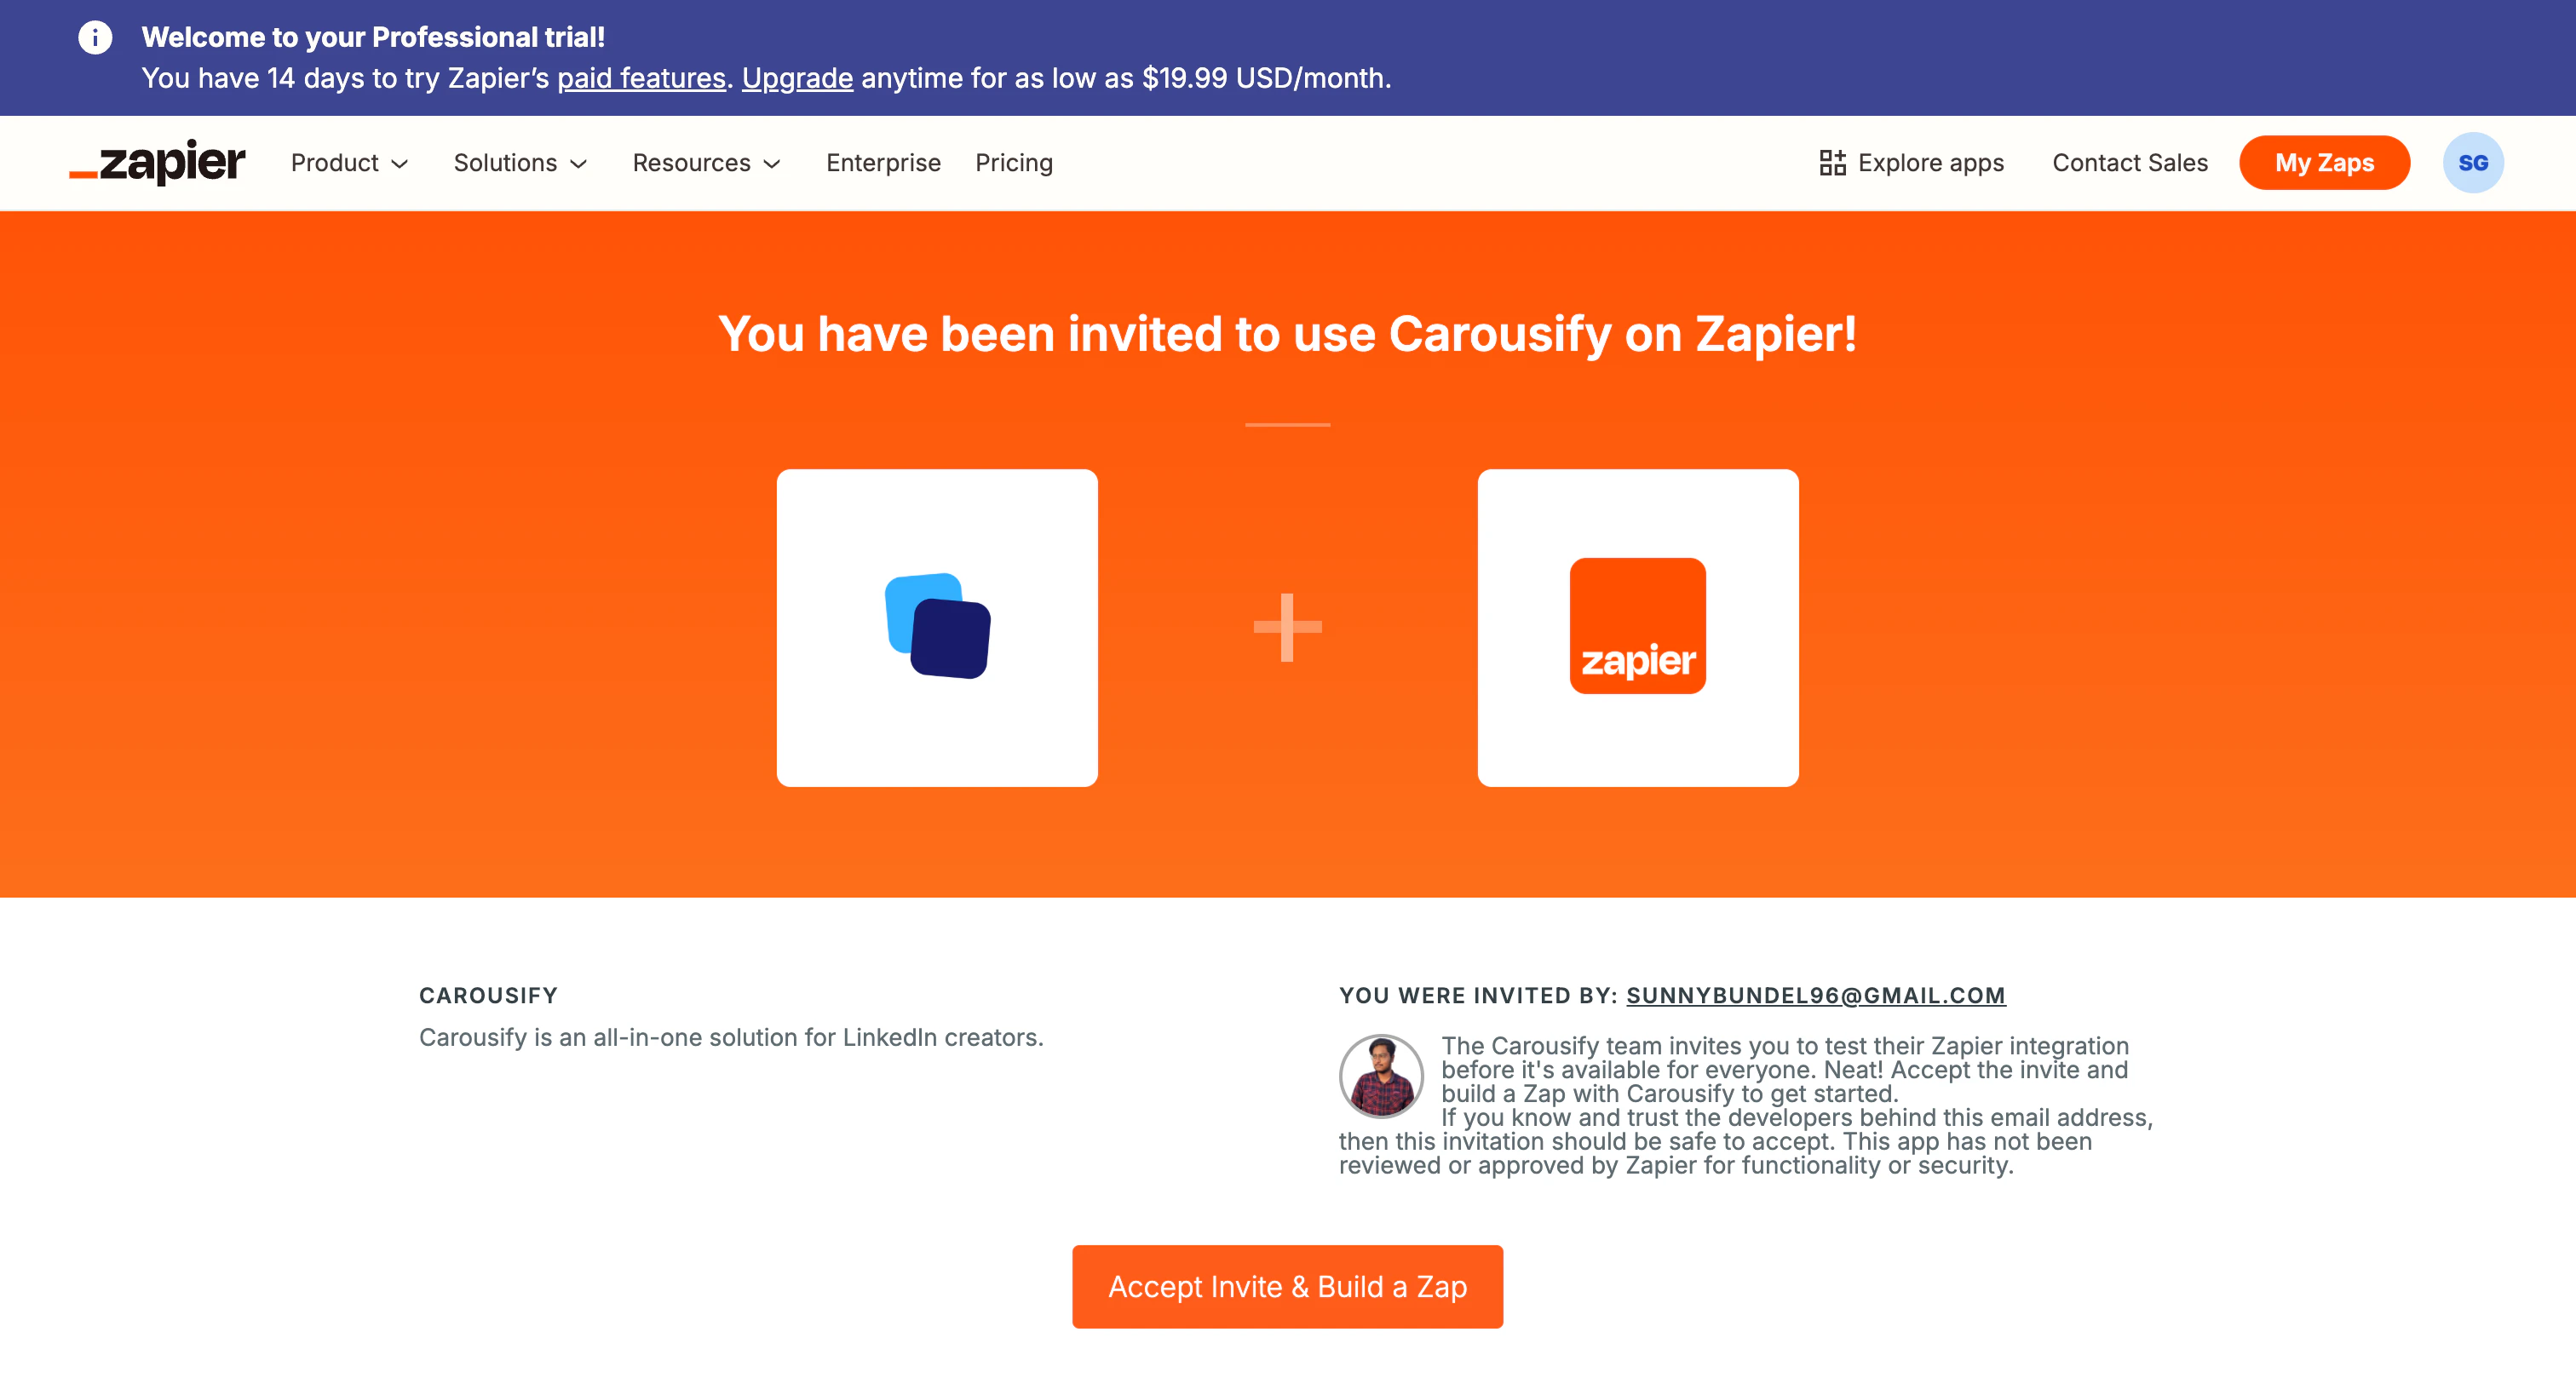
Step 3 — Start a new Zap
Click Create Zap (or + Create in the sidebar). Zapier opens an empty editor with a placeholder trigger and action.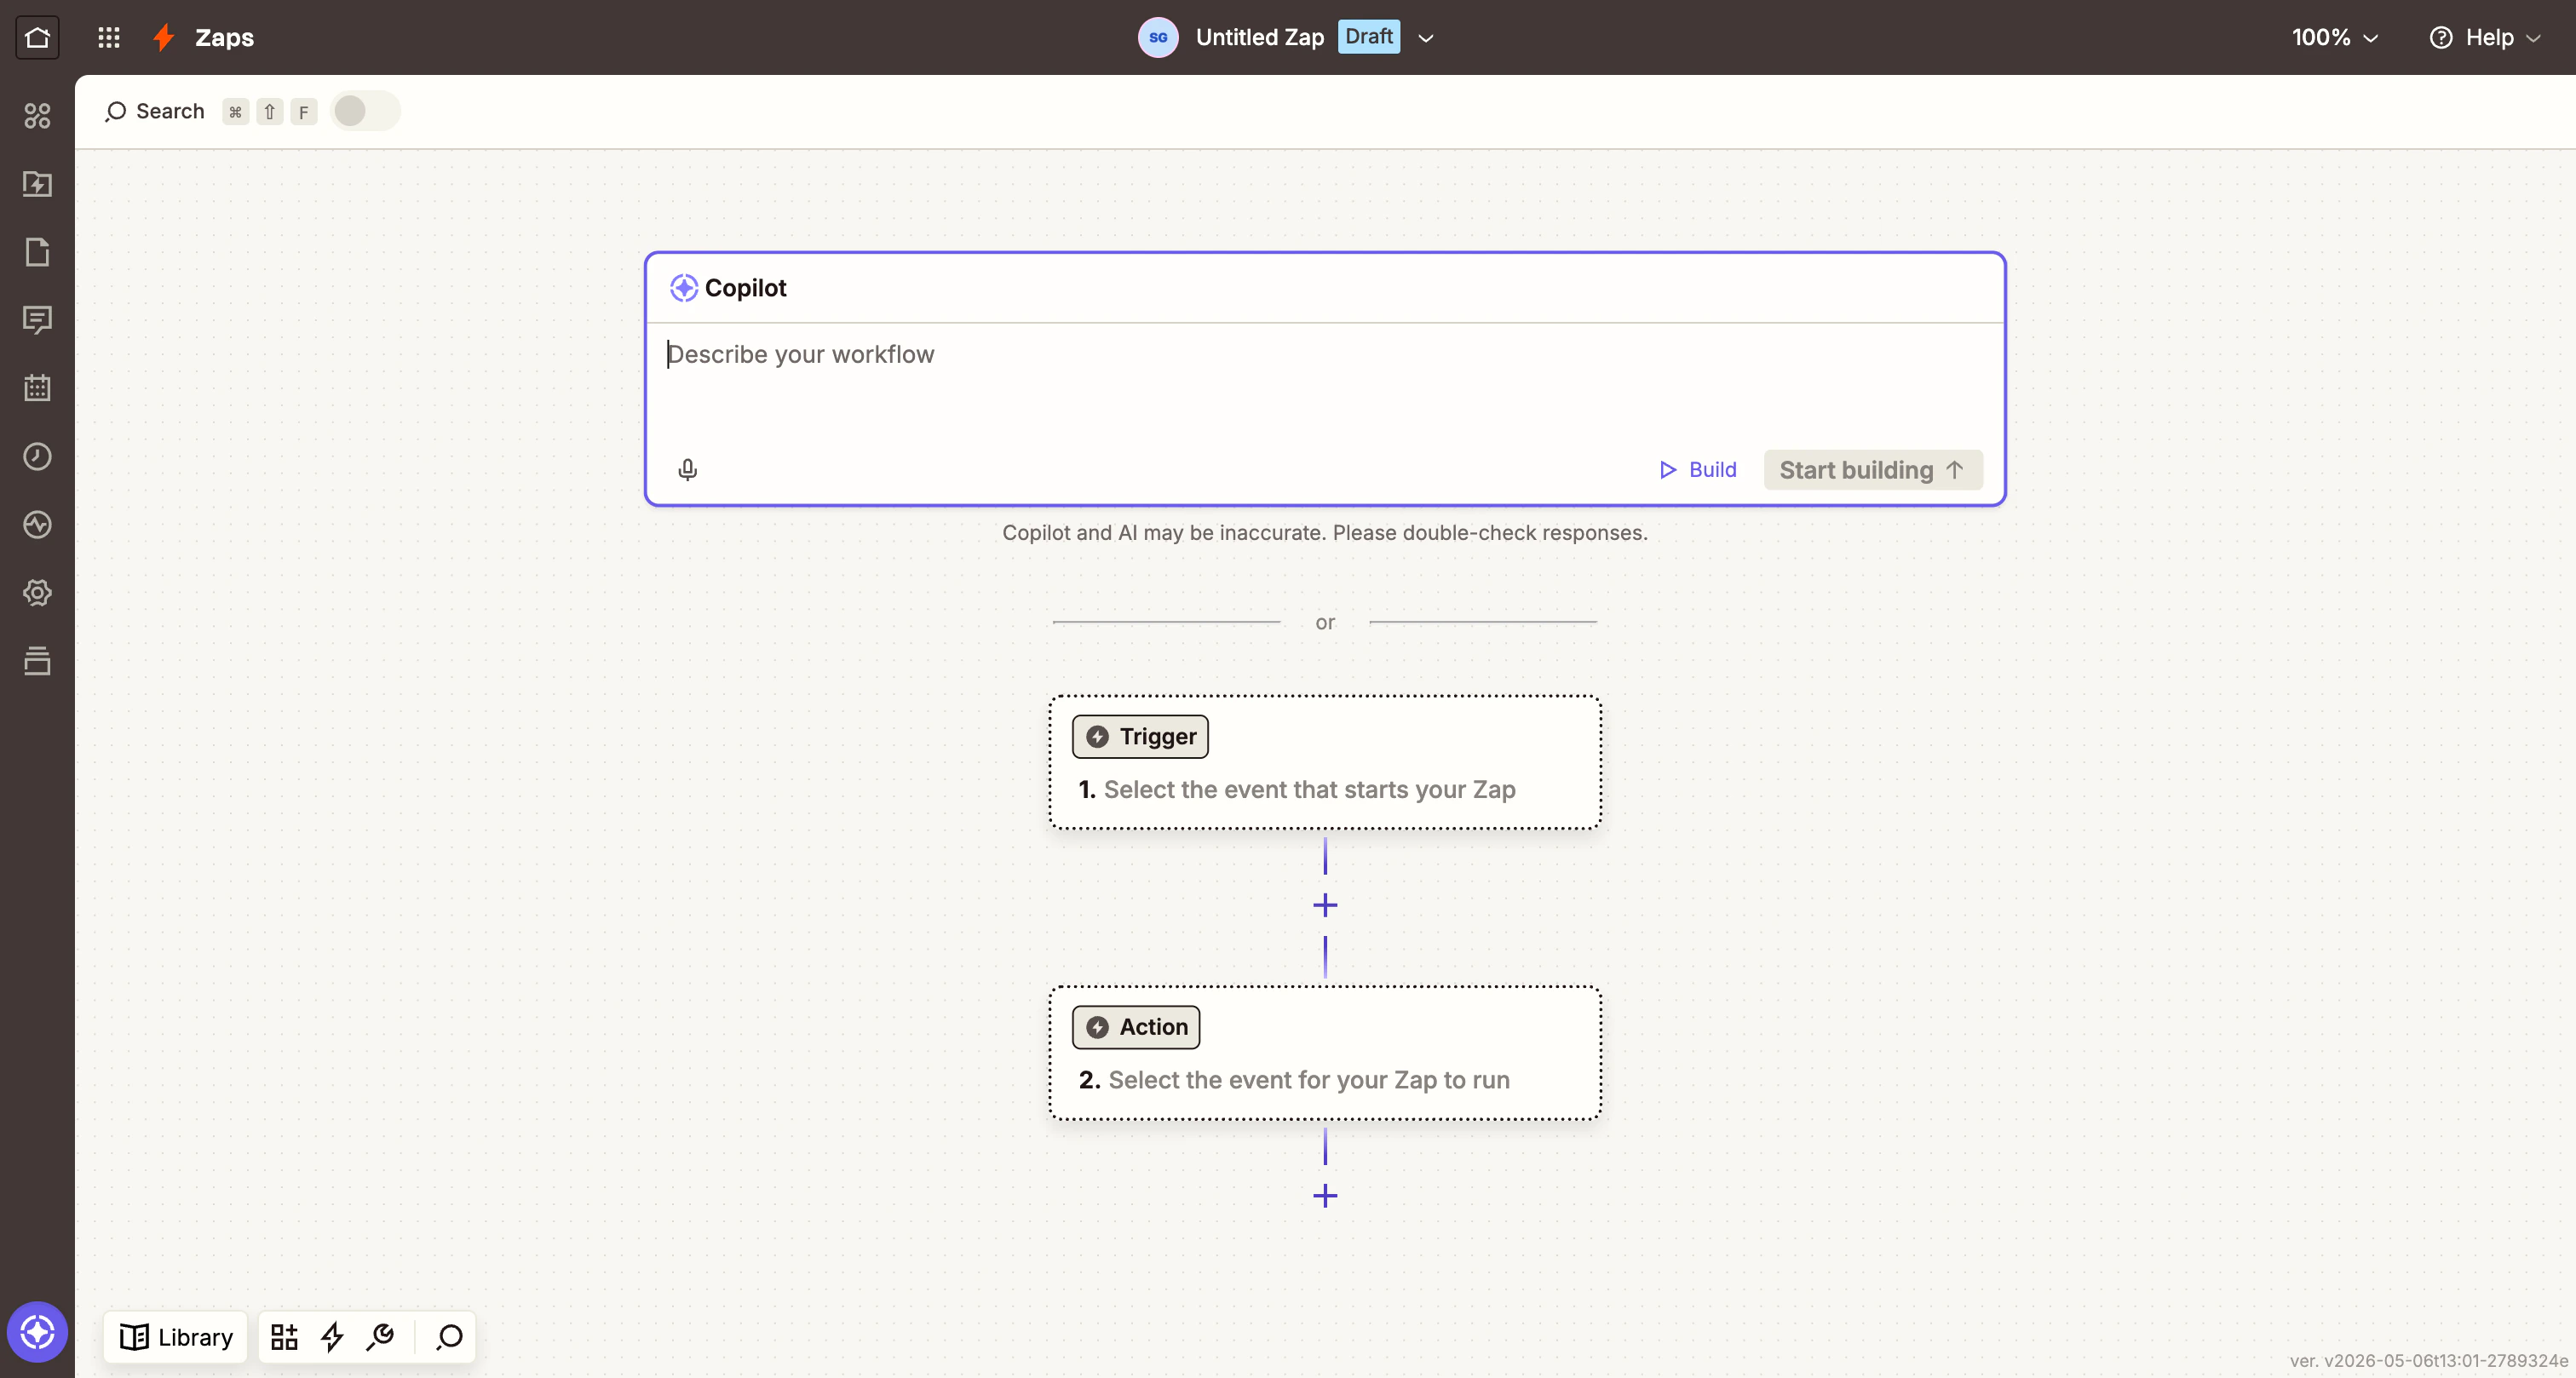
Step 4 — Sign in with your Carousify API key
Click Sign in to Carousify (or Connect Carousify). A popup appears asking for your API Key.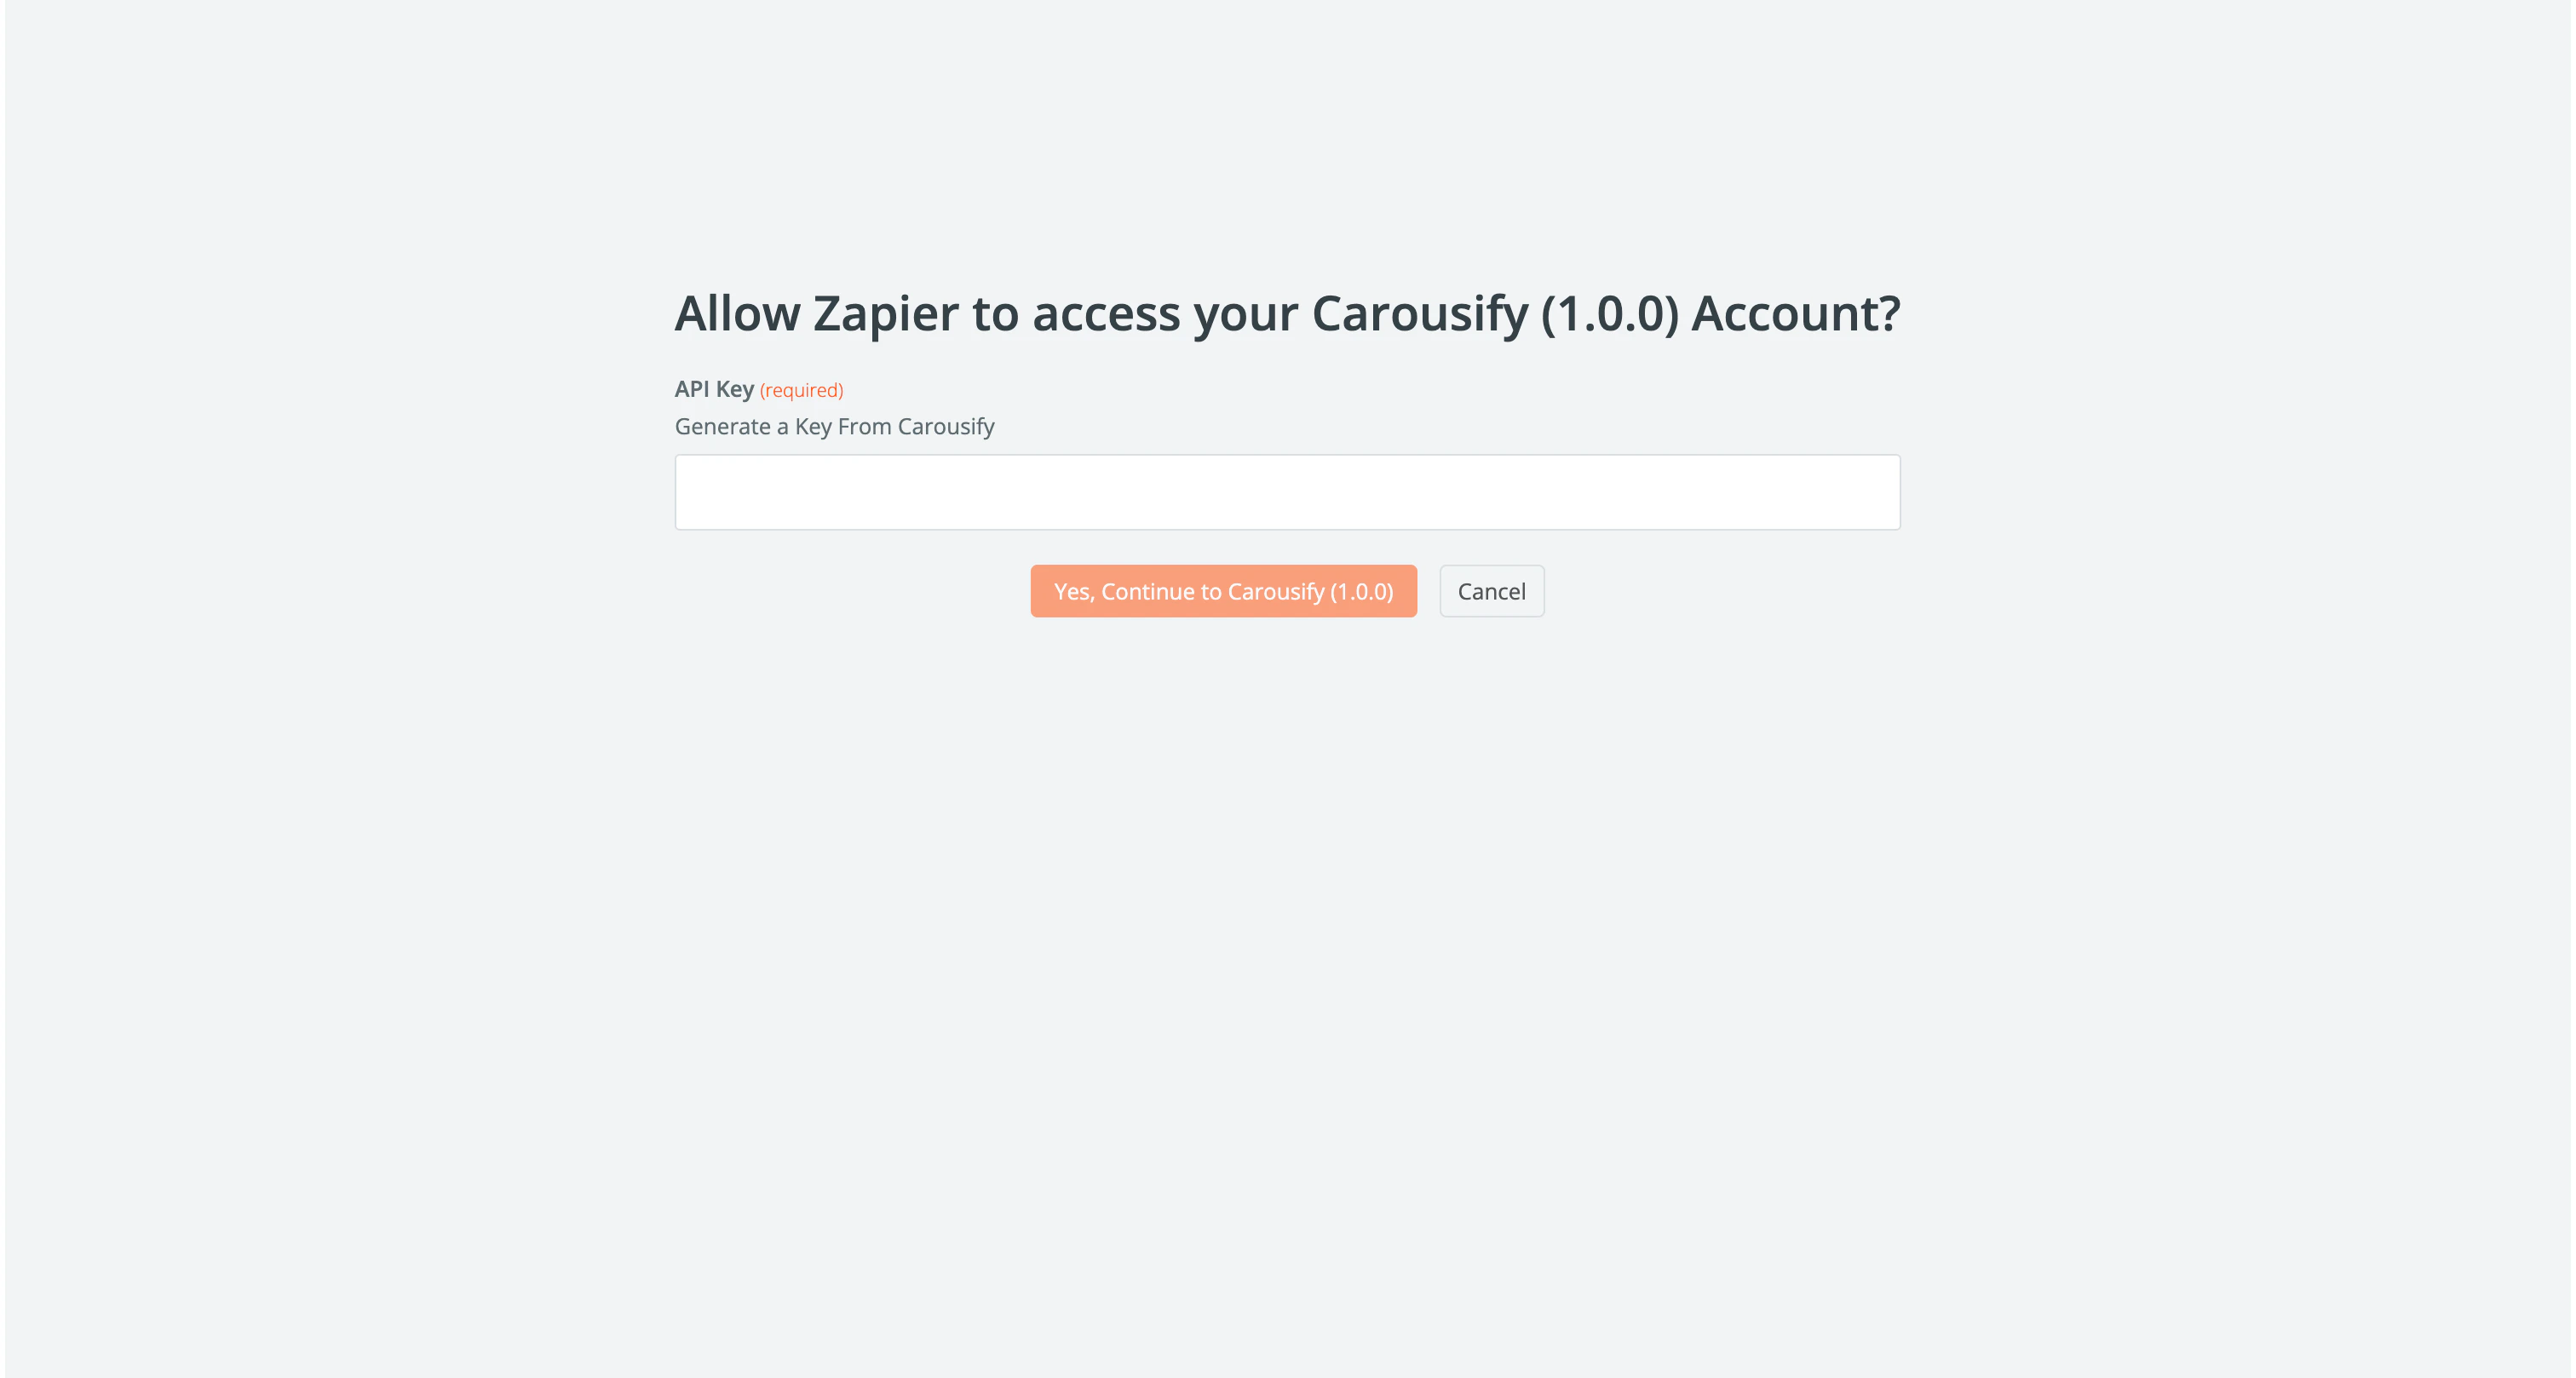
Step 5 — Pull a sample event
Click Test trigger. Zapier asks Carousify for a recent event so you can see exactly what data the trigger emits.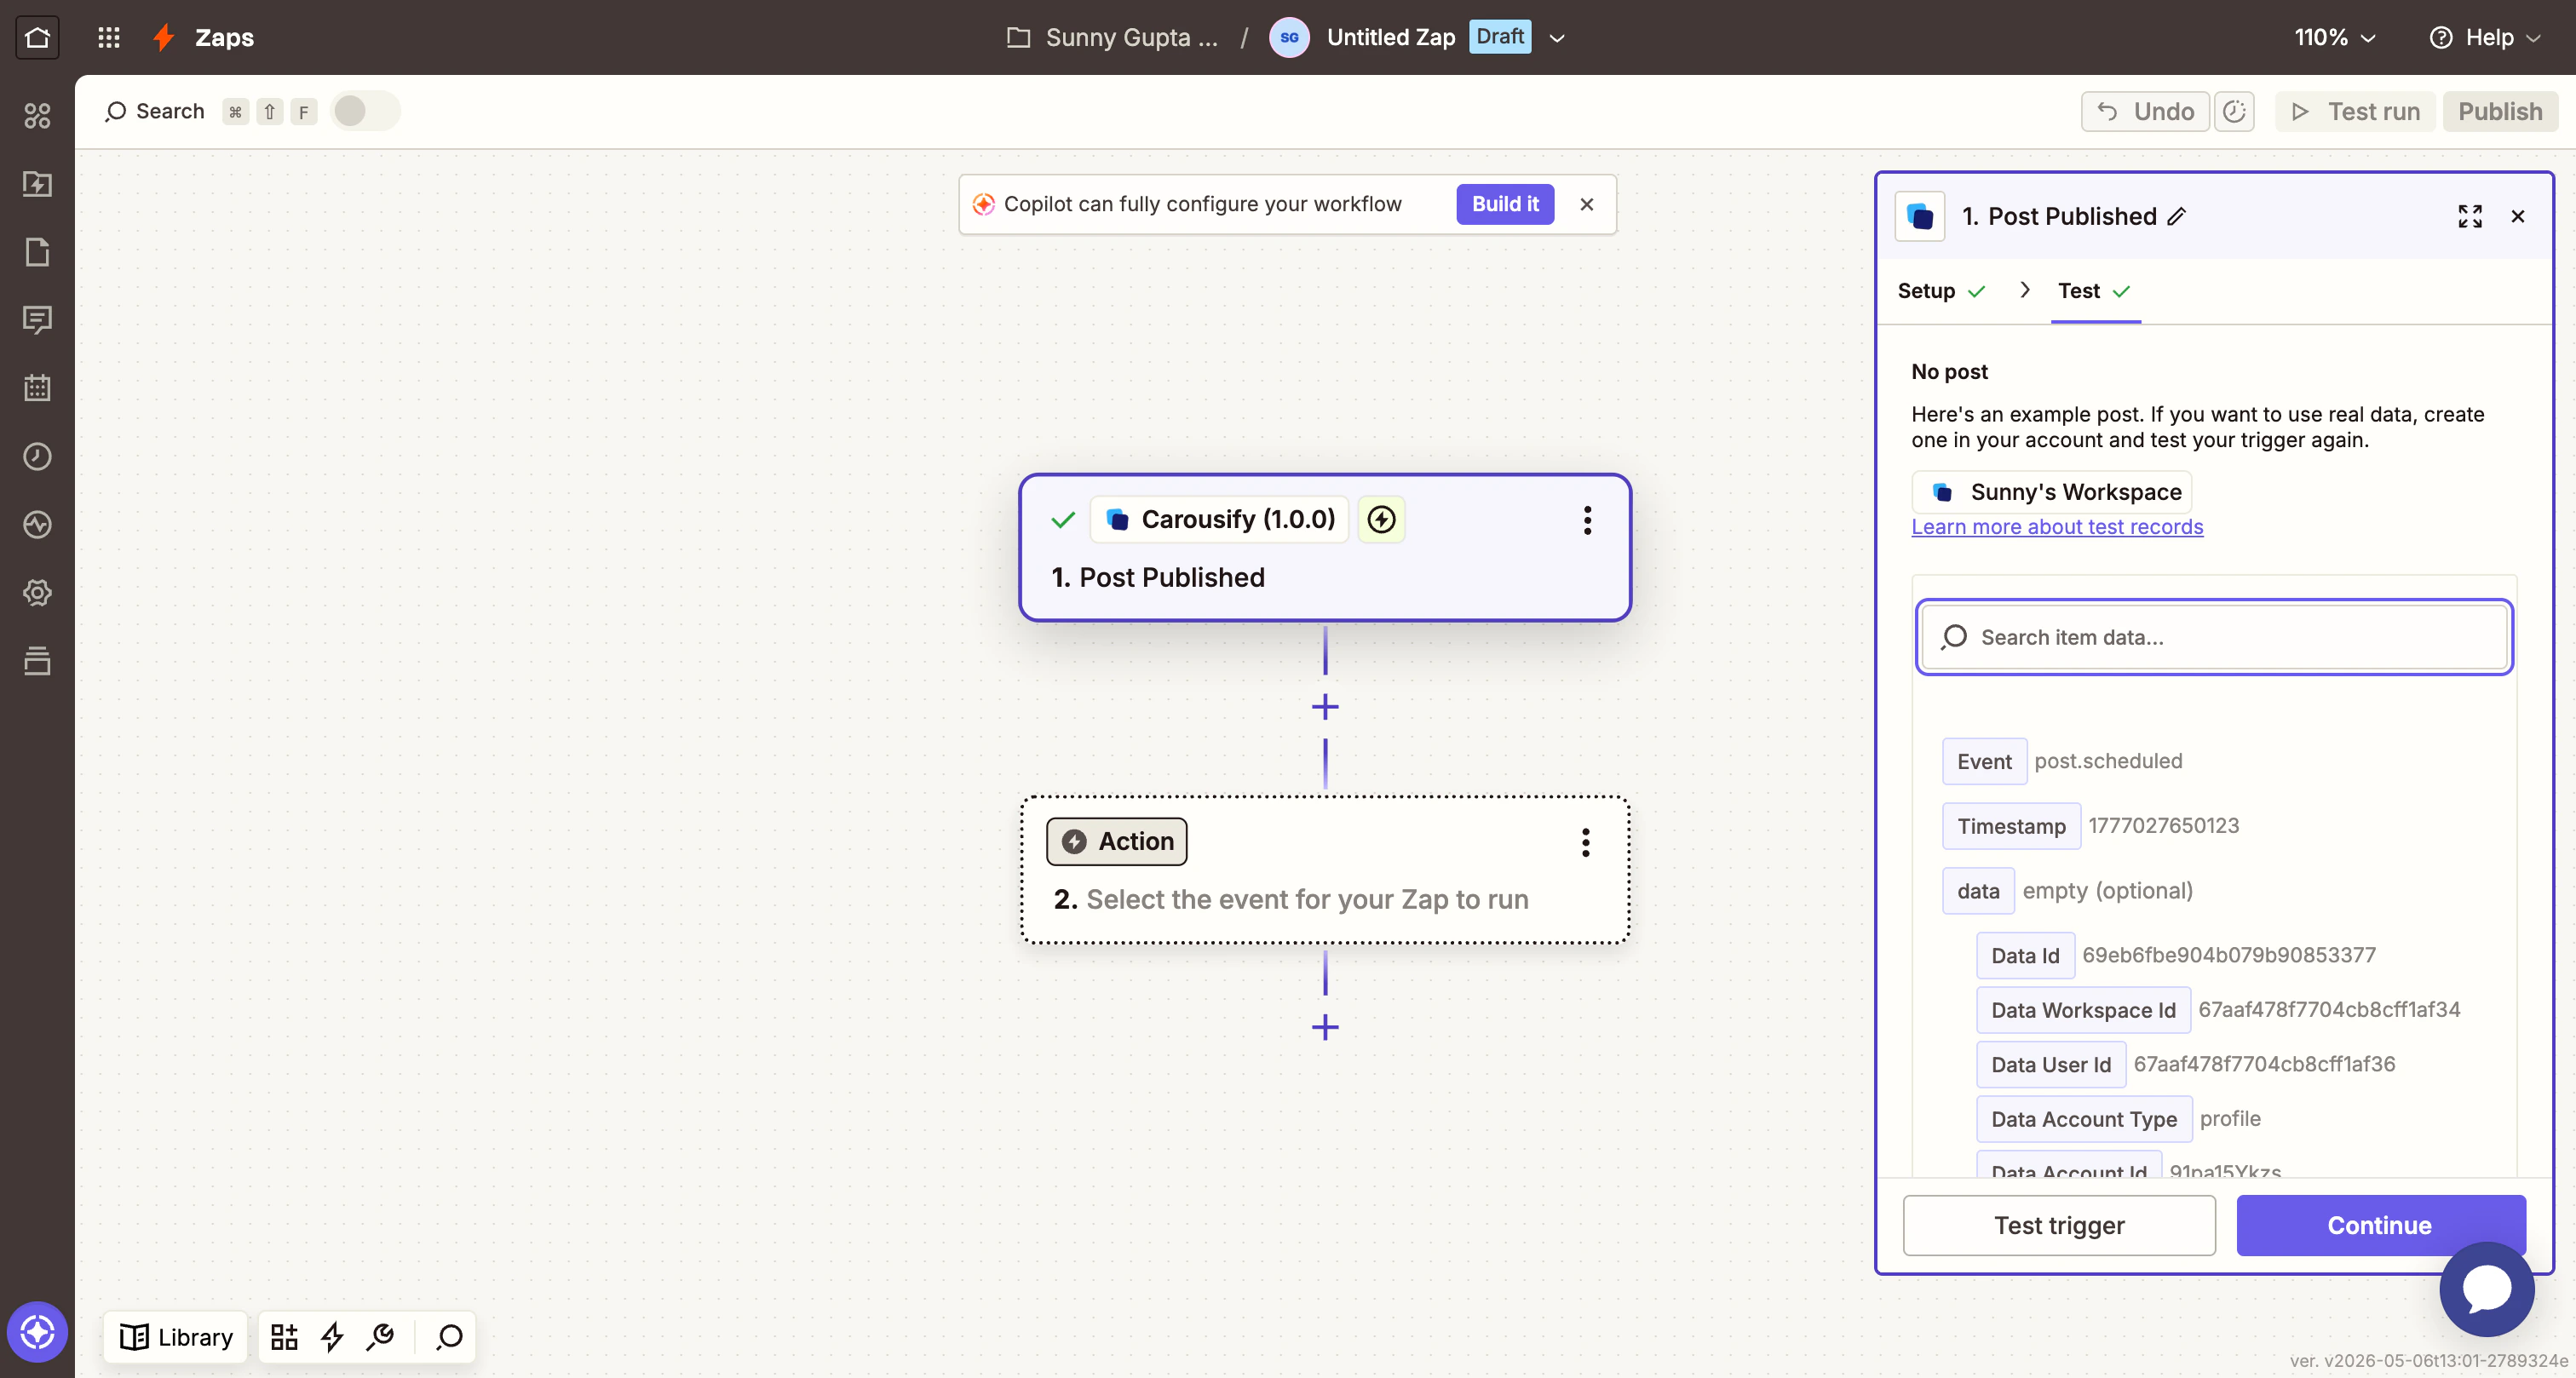
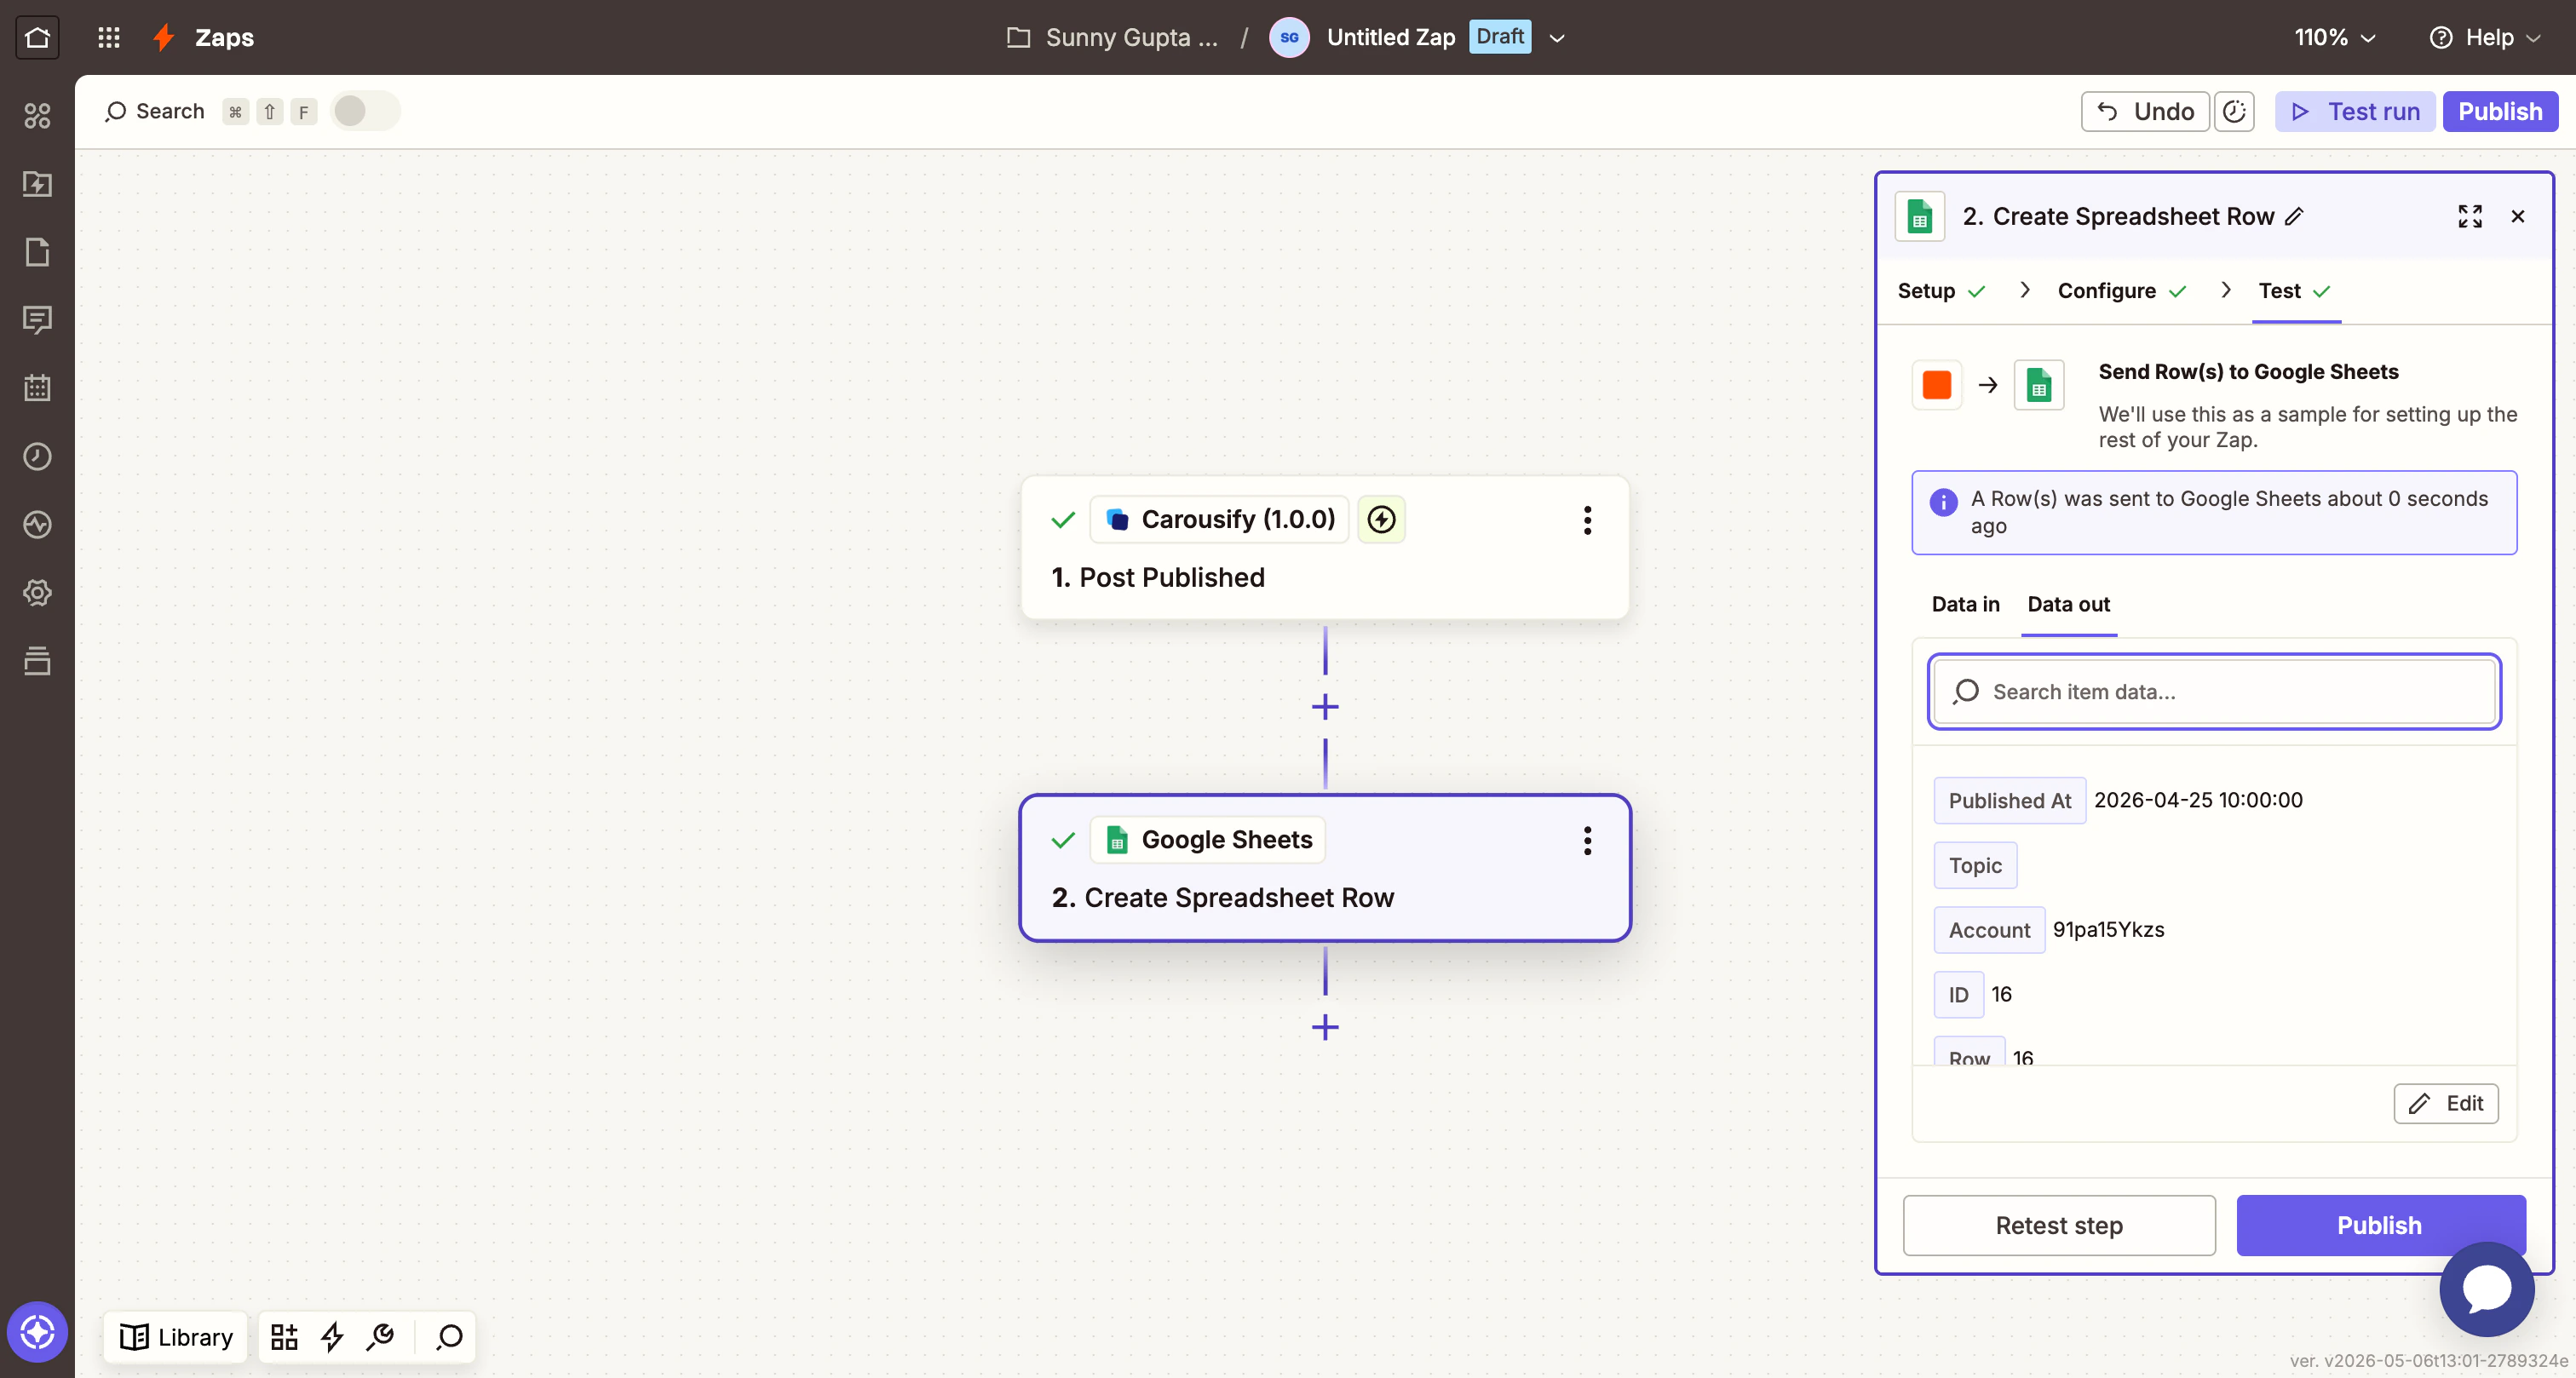
Step 6 — Add a Google Sheets action
Click the Action card. Search Google Sheets and pick it. For Action event, choose Create Spreadsheet Row and click Continue.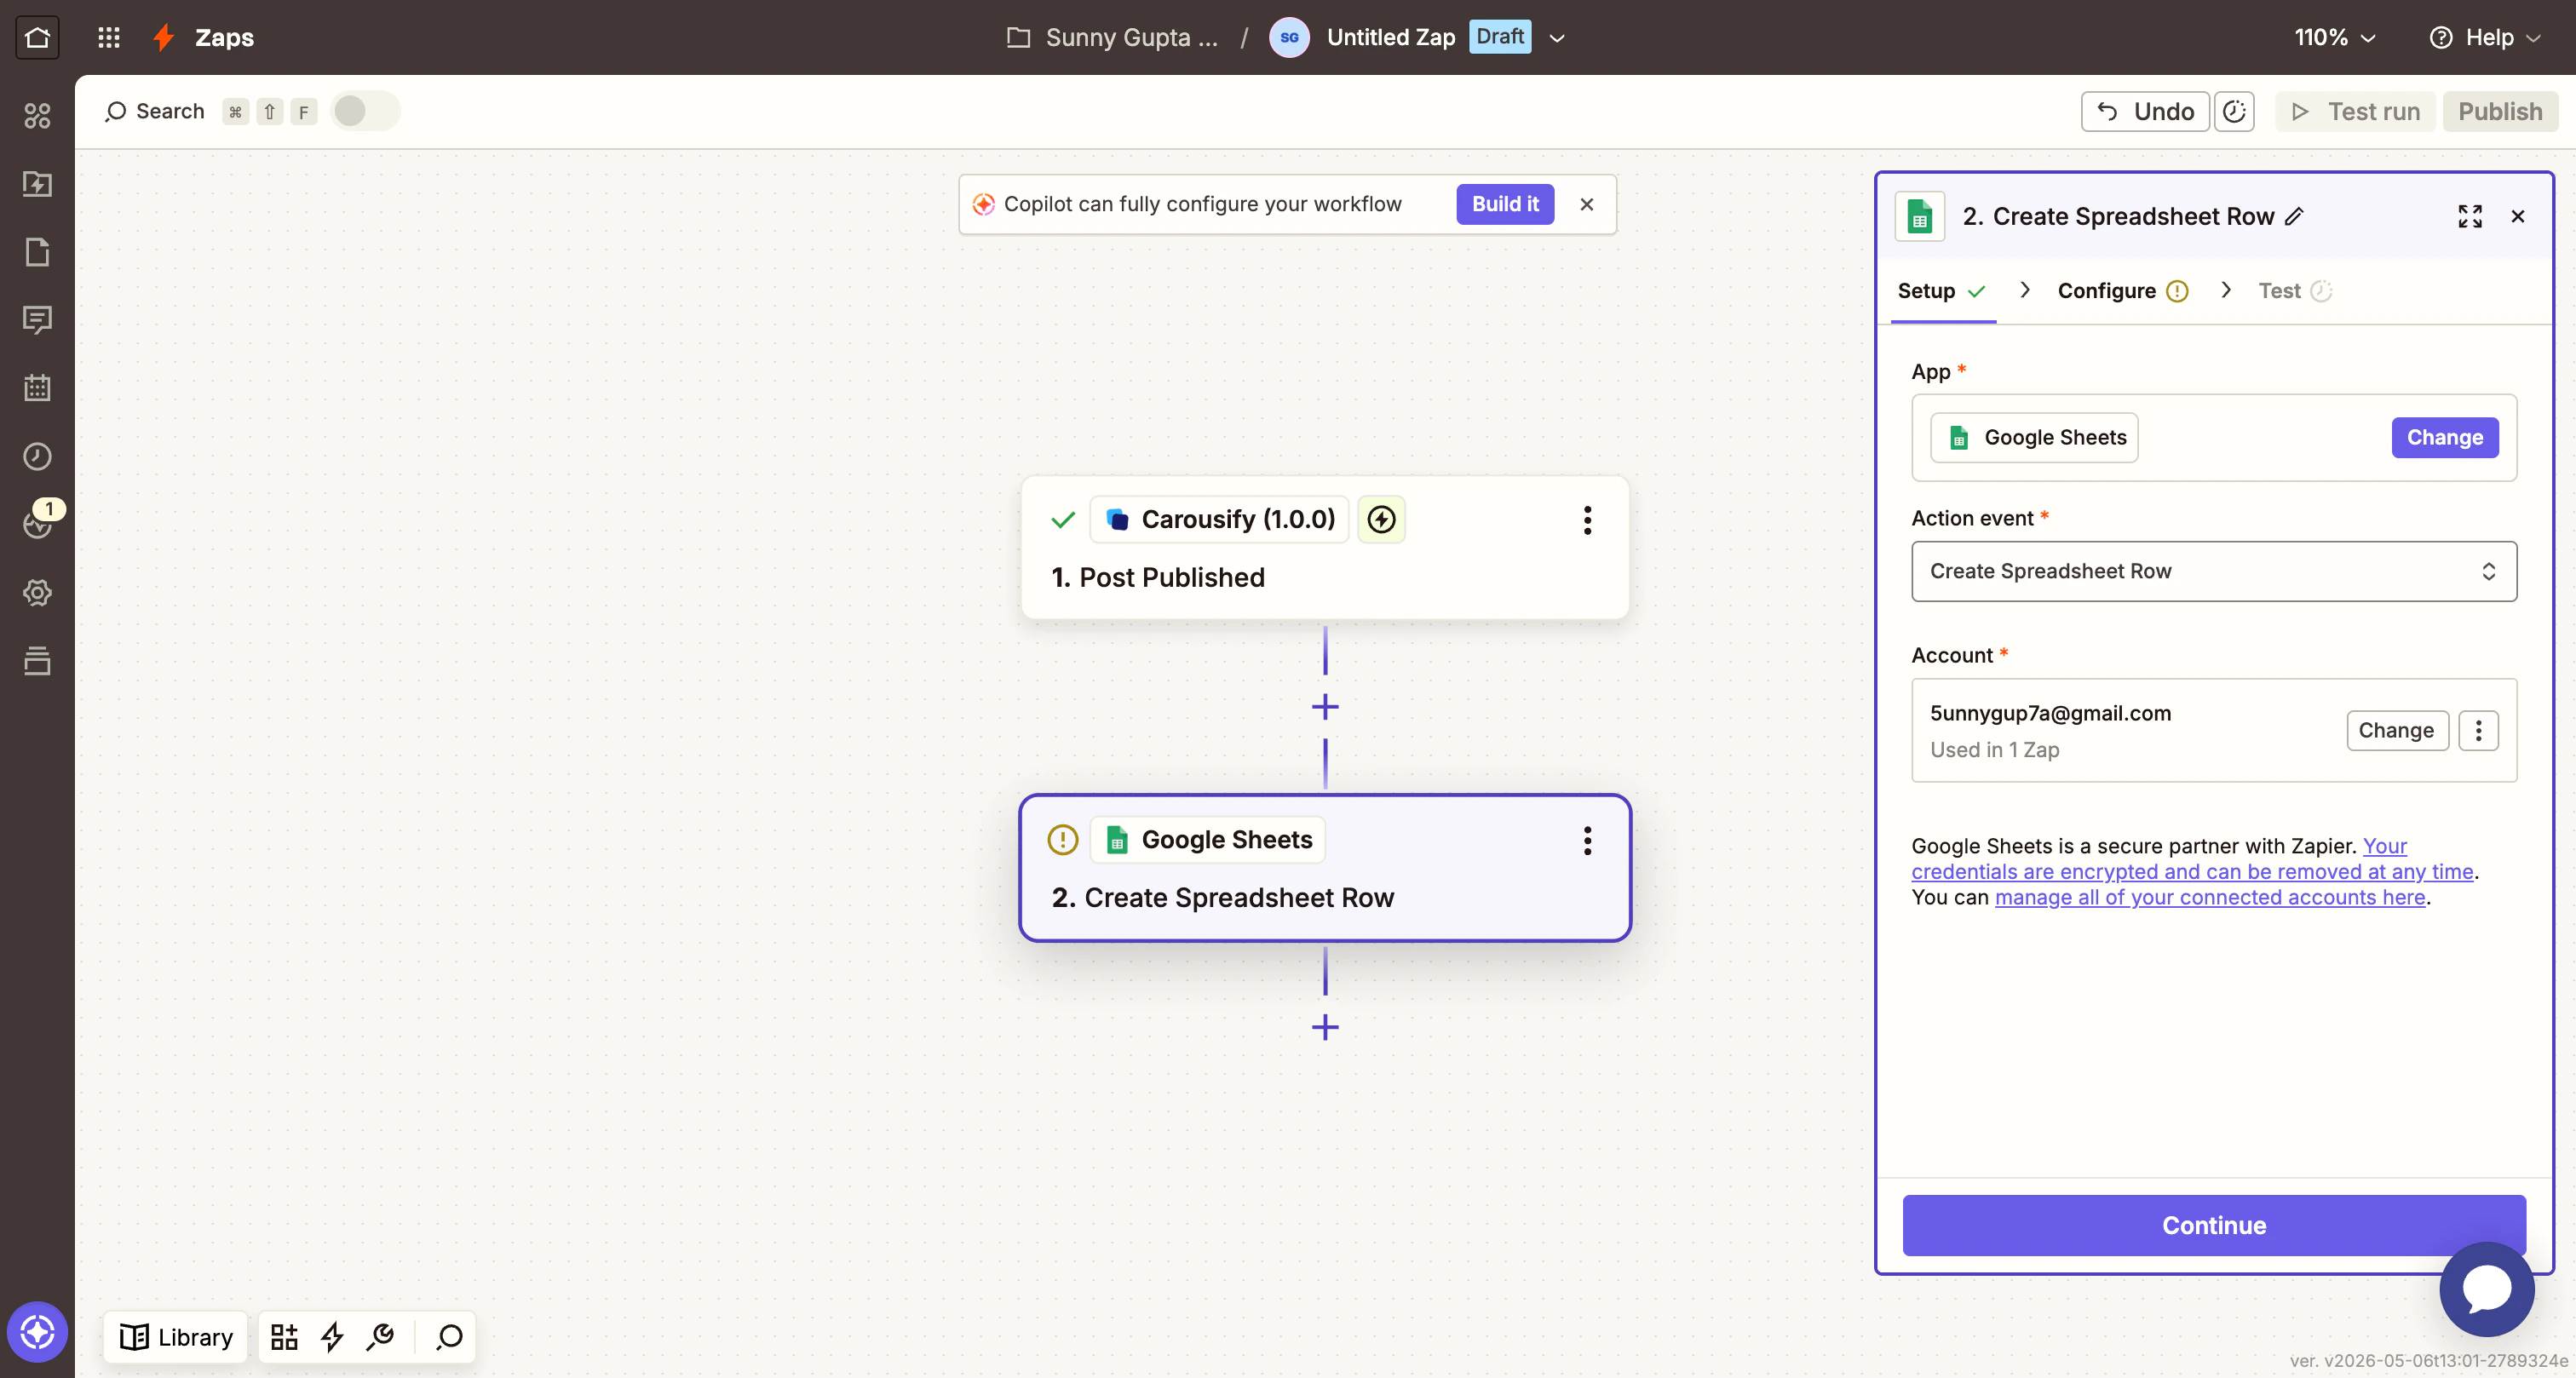
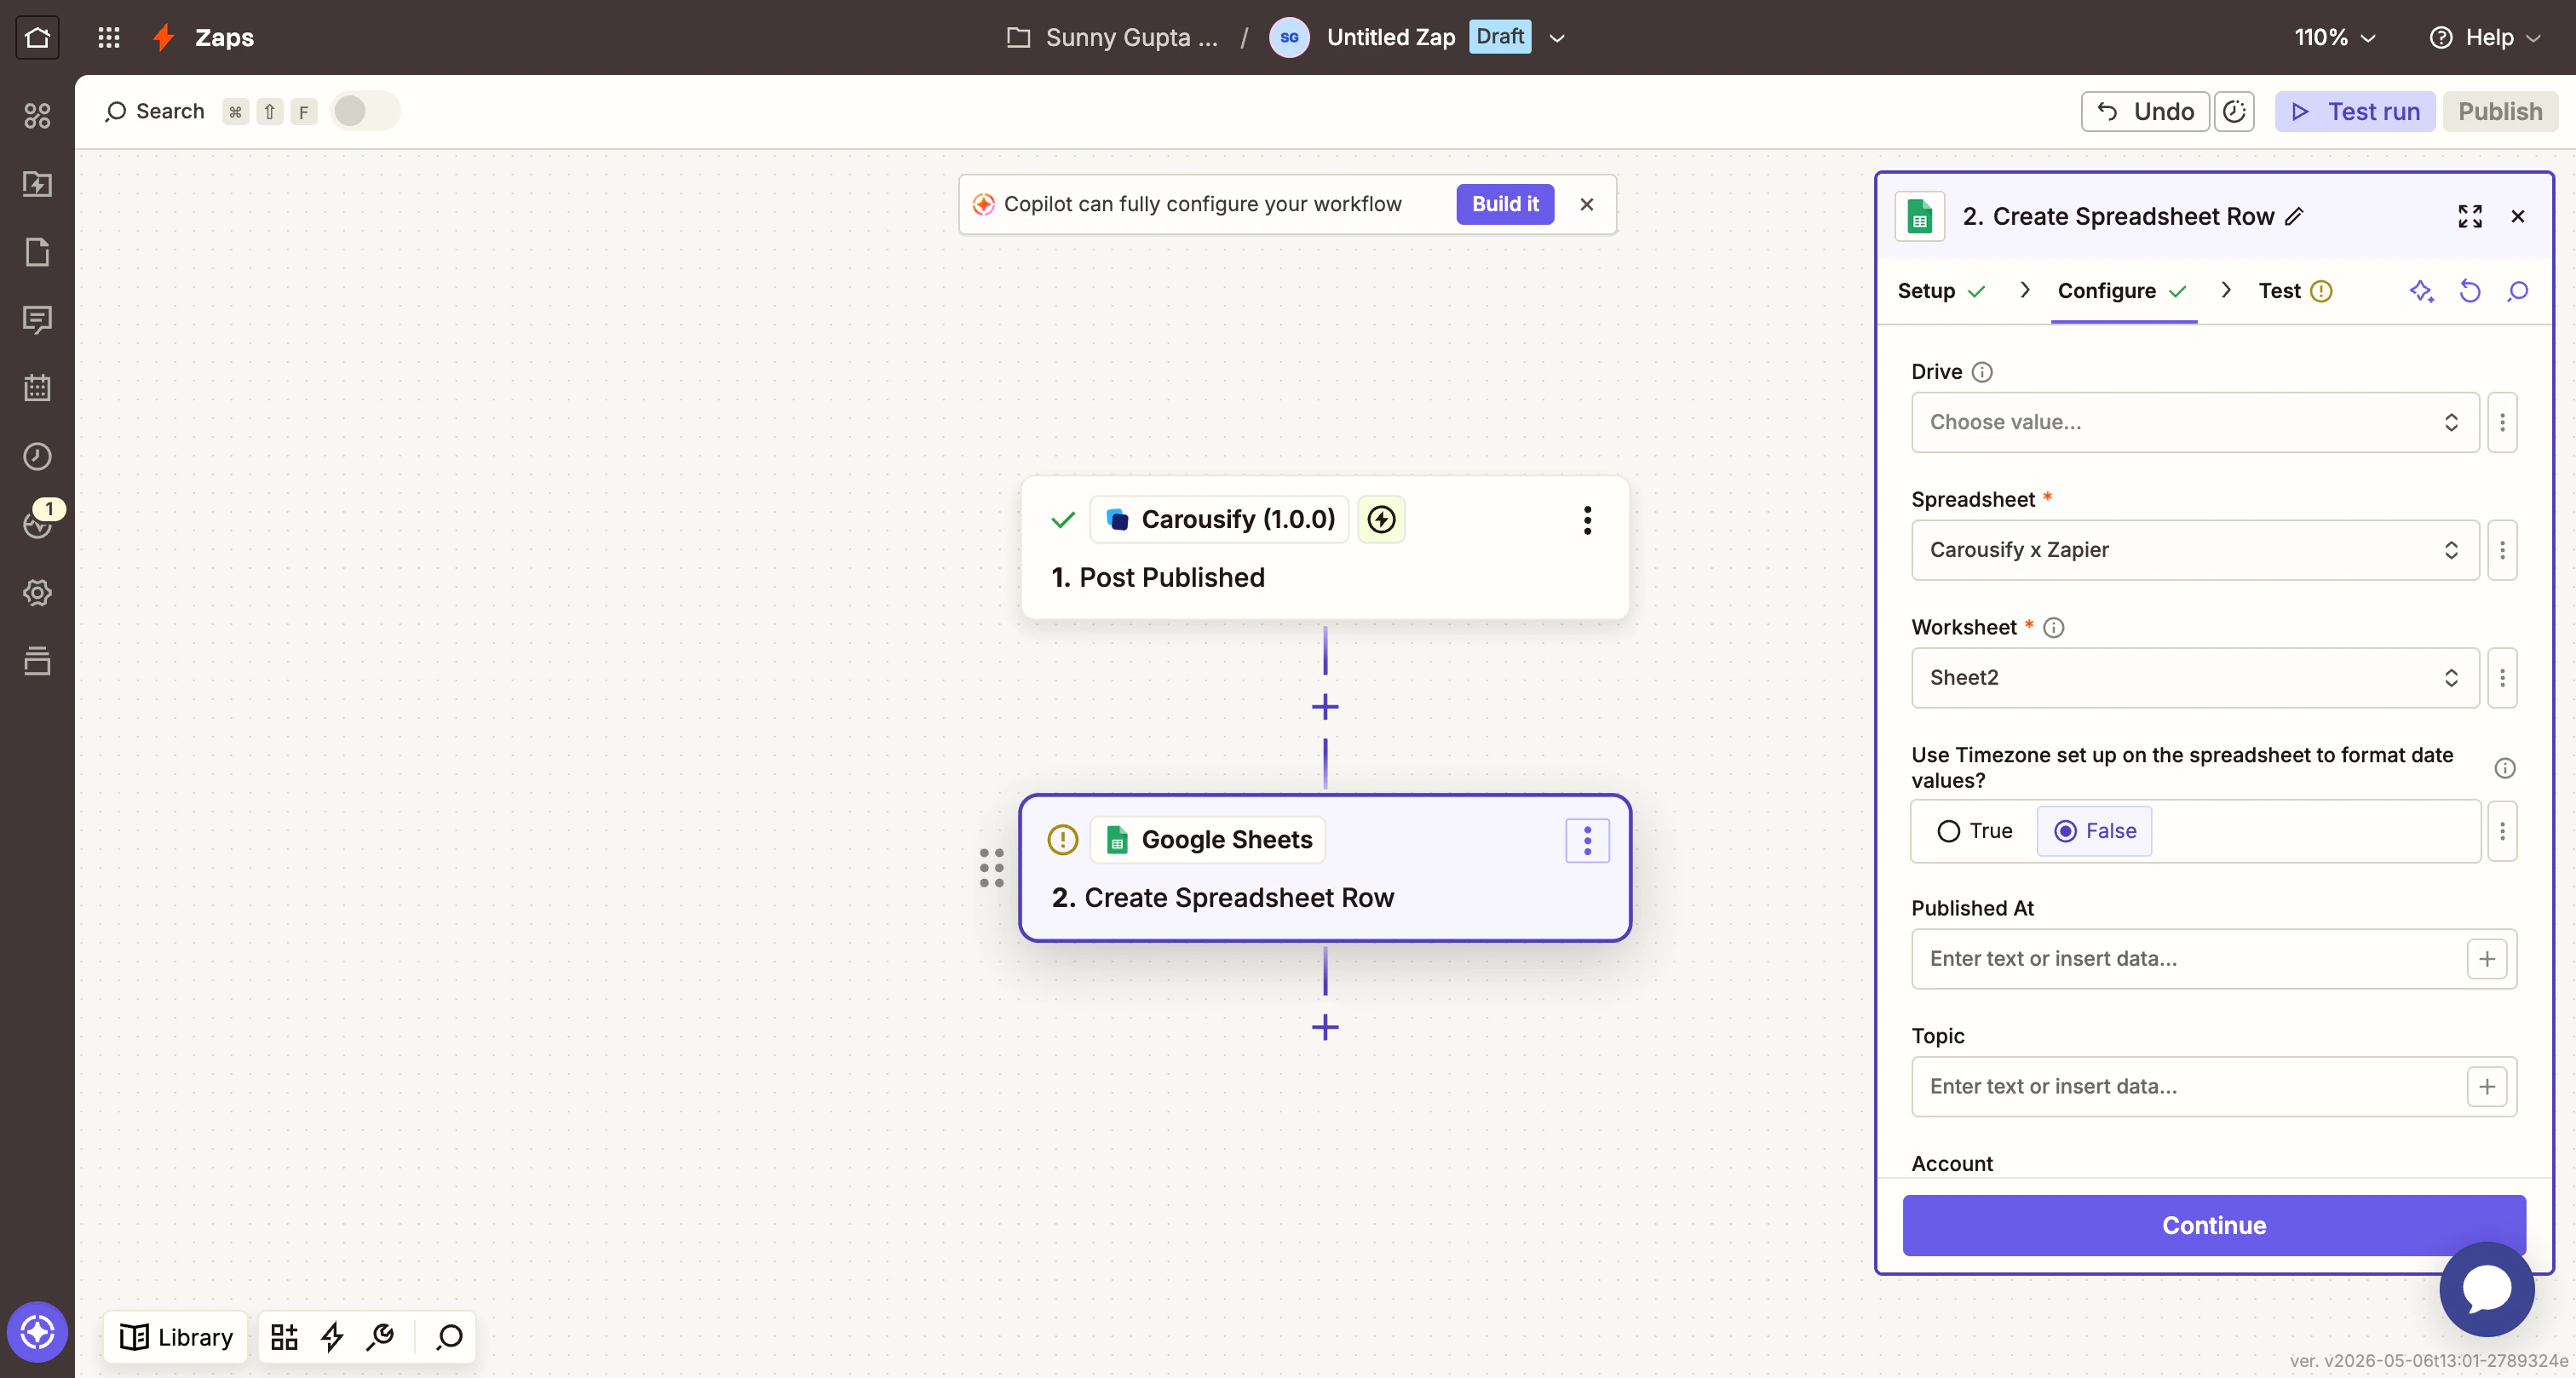
- Spreadsheet — pick the sheet you want to log into (e.g. Carousify x Zapier).
- Worksheet — pick the tab. Zapier reads the header row to populate the column inputs below.
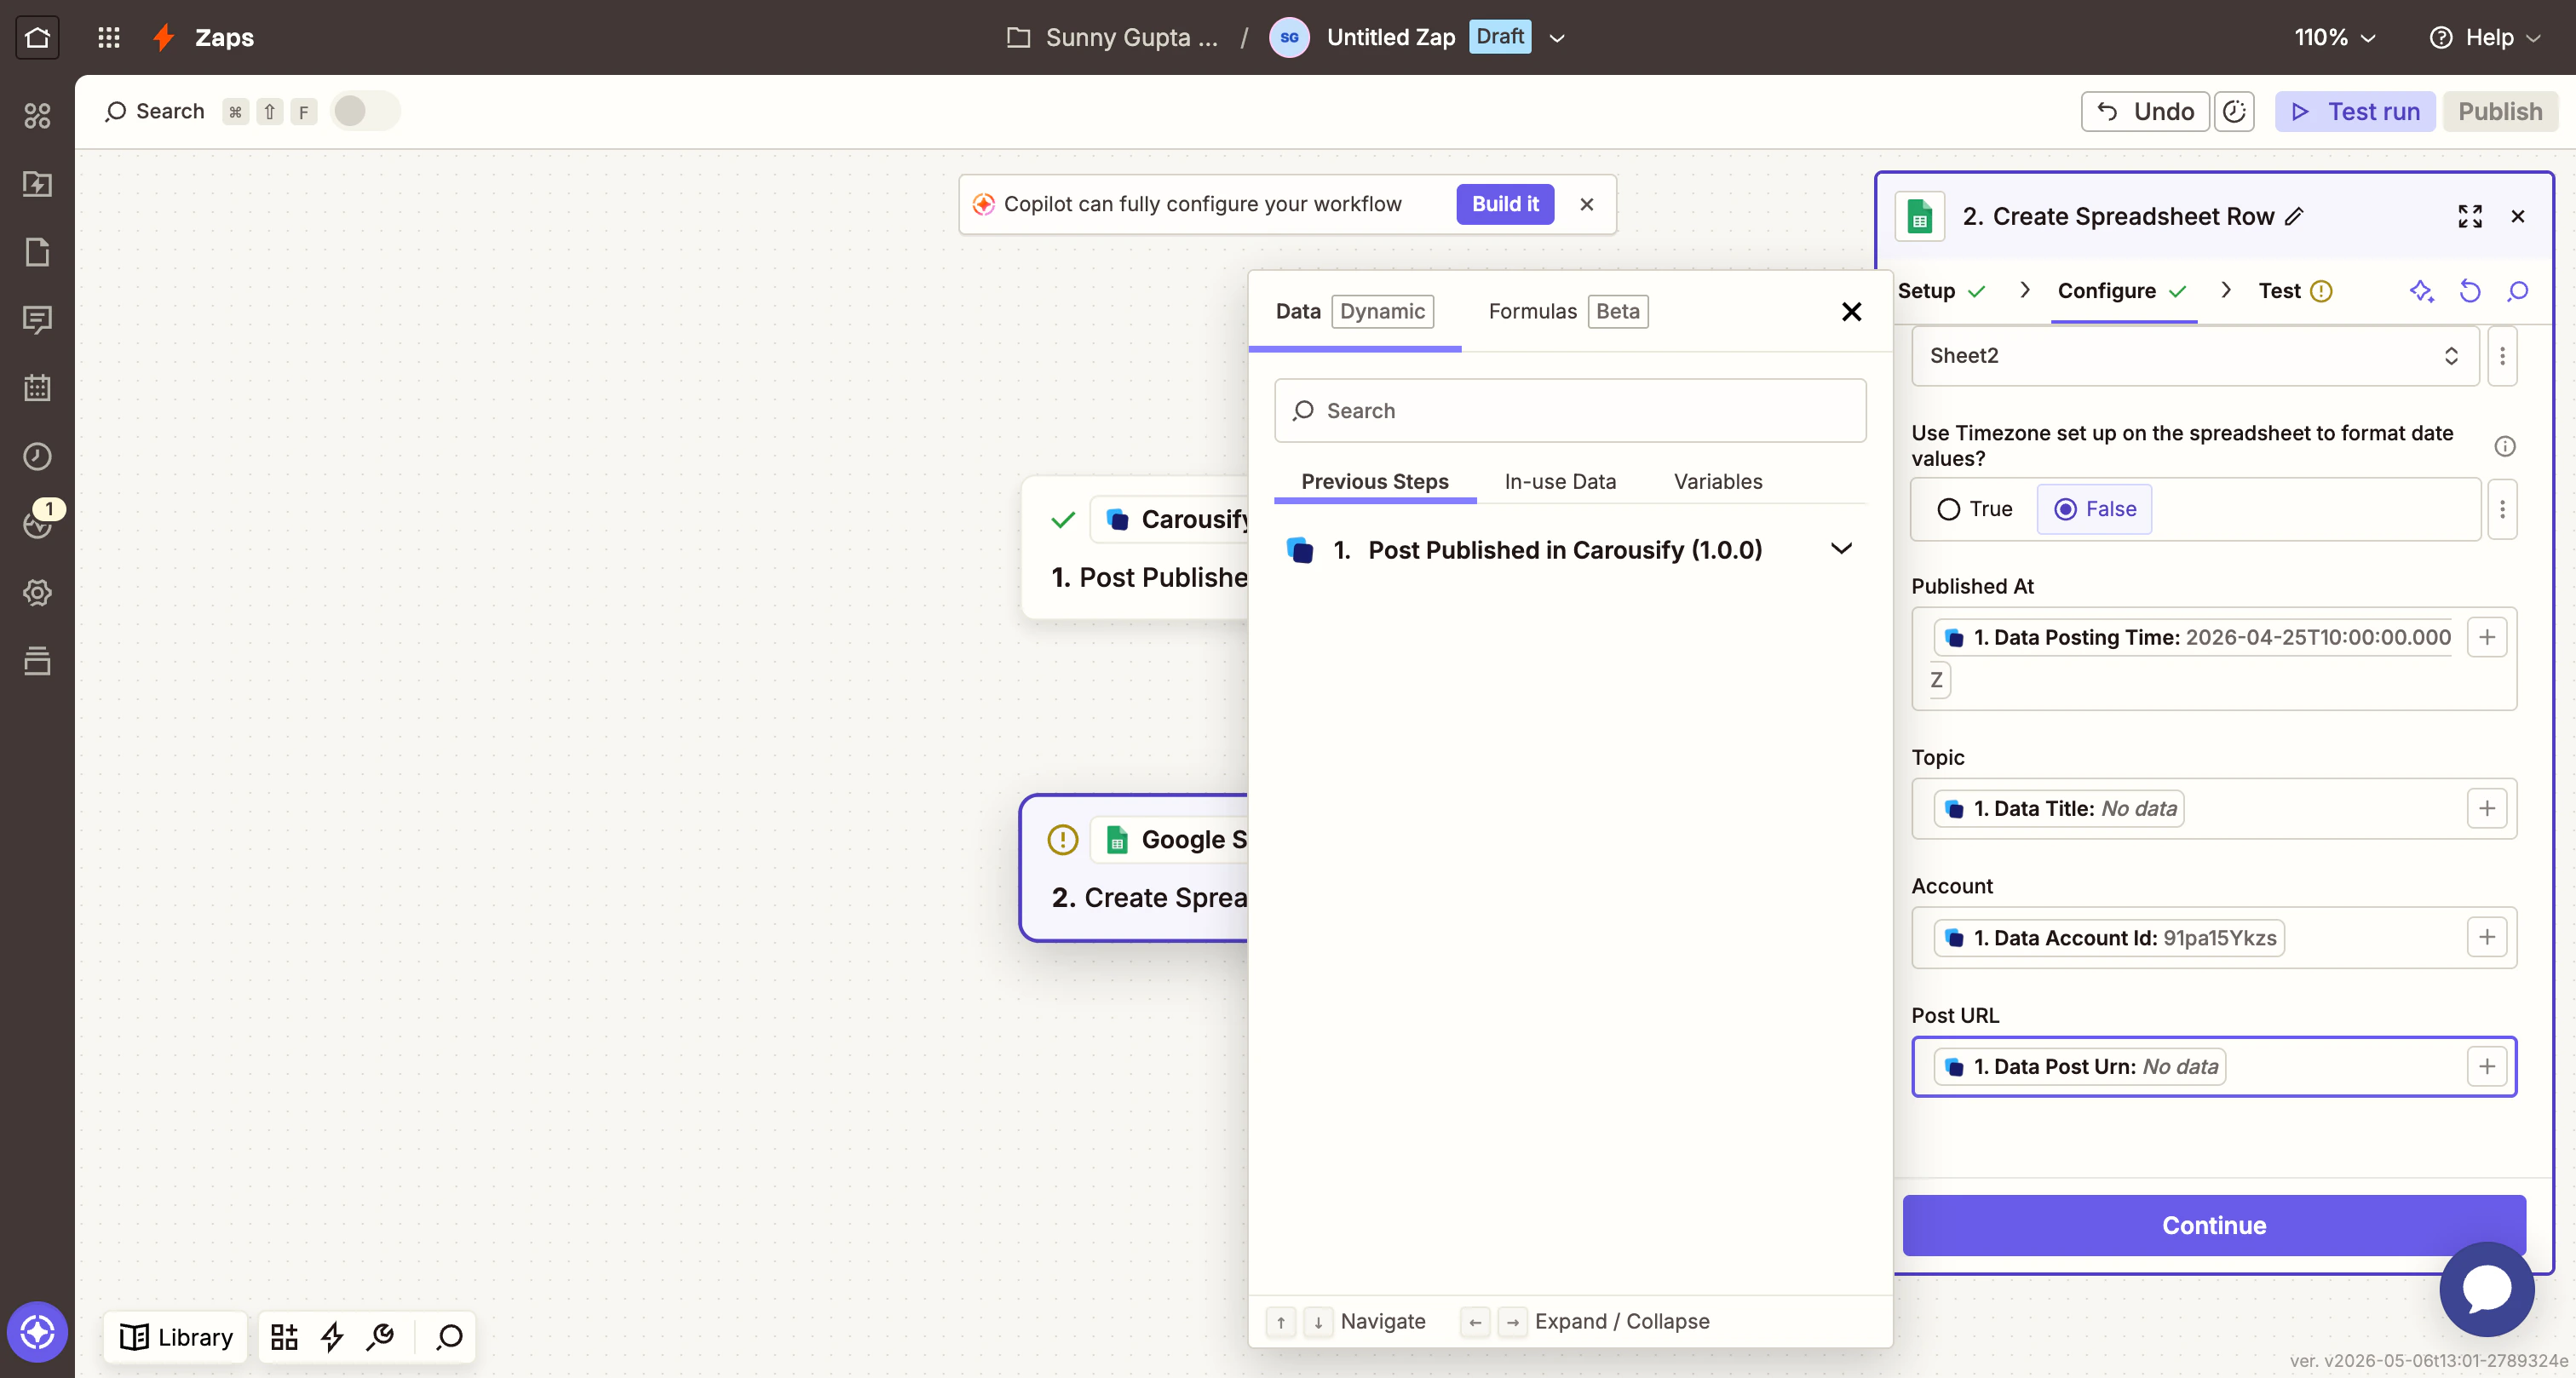
Step 7 — Map Carousify fields to your sheet columns
Each column in your sheet appears as an input. Click Add a field mapping next to each and pick the matching Carousify field from the previous step. For a sheet with columns Published At / Topic / Account / Post URL, the natural mapping is:| Sheet column | Carousify field |
|---|---|
| Published At | Data Posting Time |
| Topic | Data Title (or Data Content if you’d rather log the body) |
| Account | Data Account Id |
| Post URL | Data Post Urn |
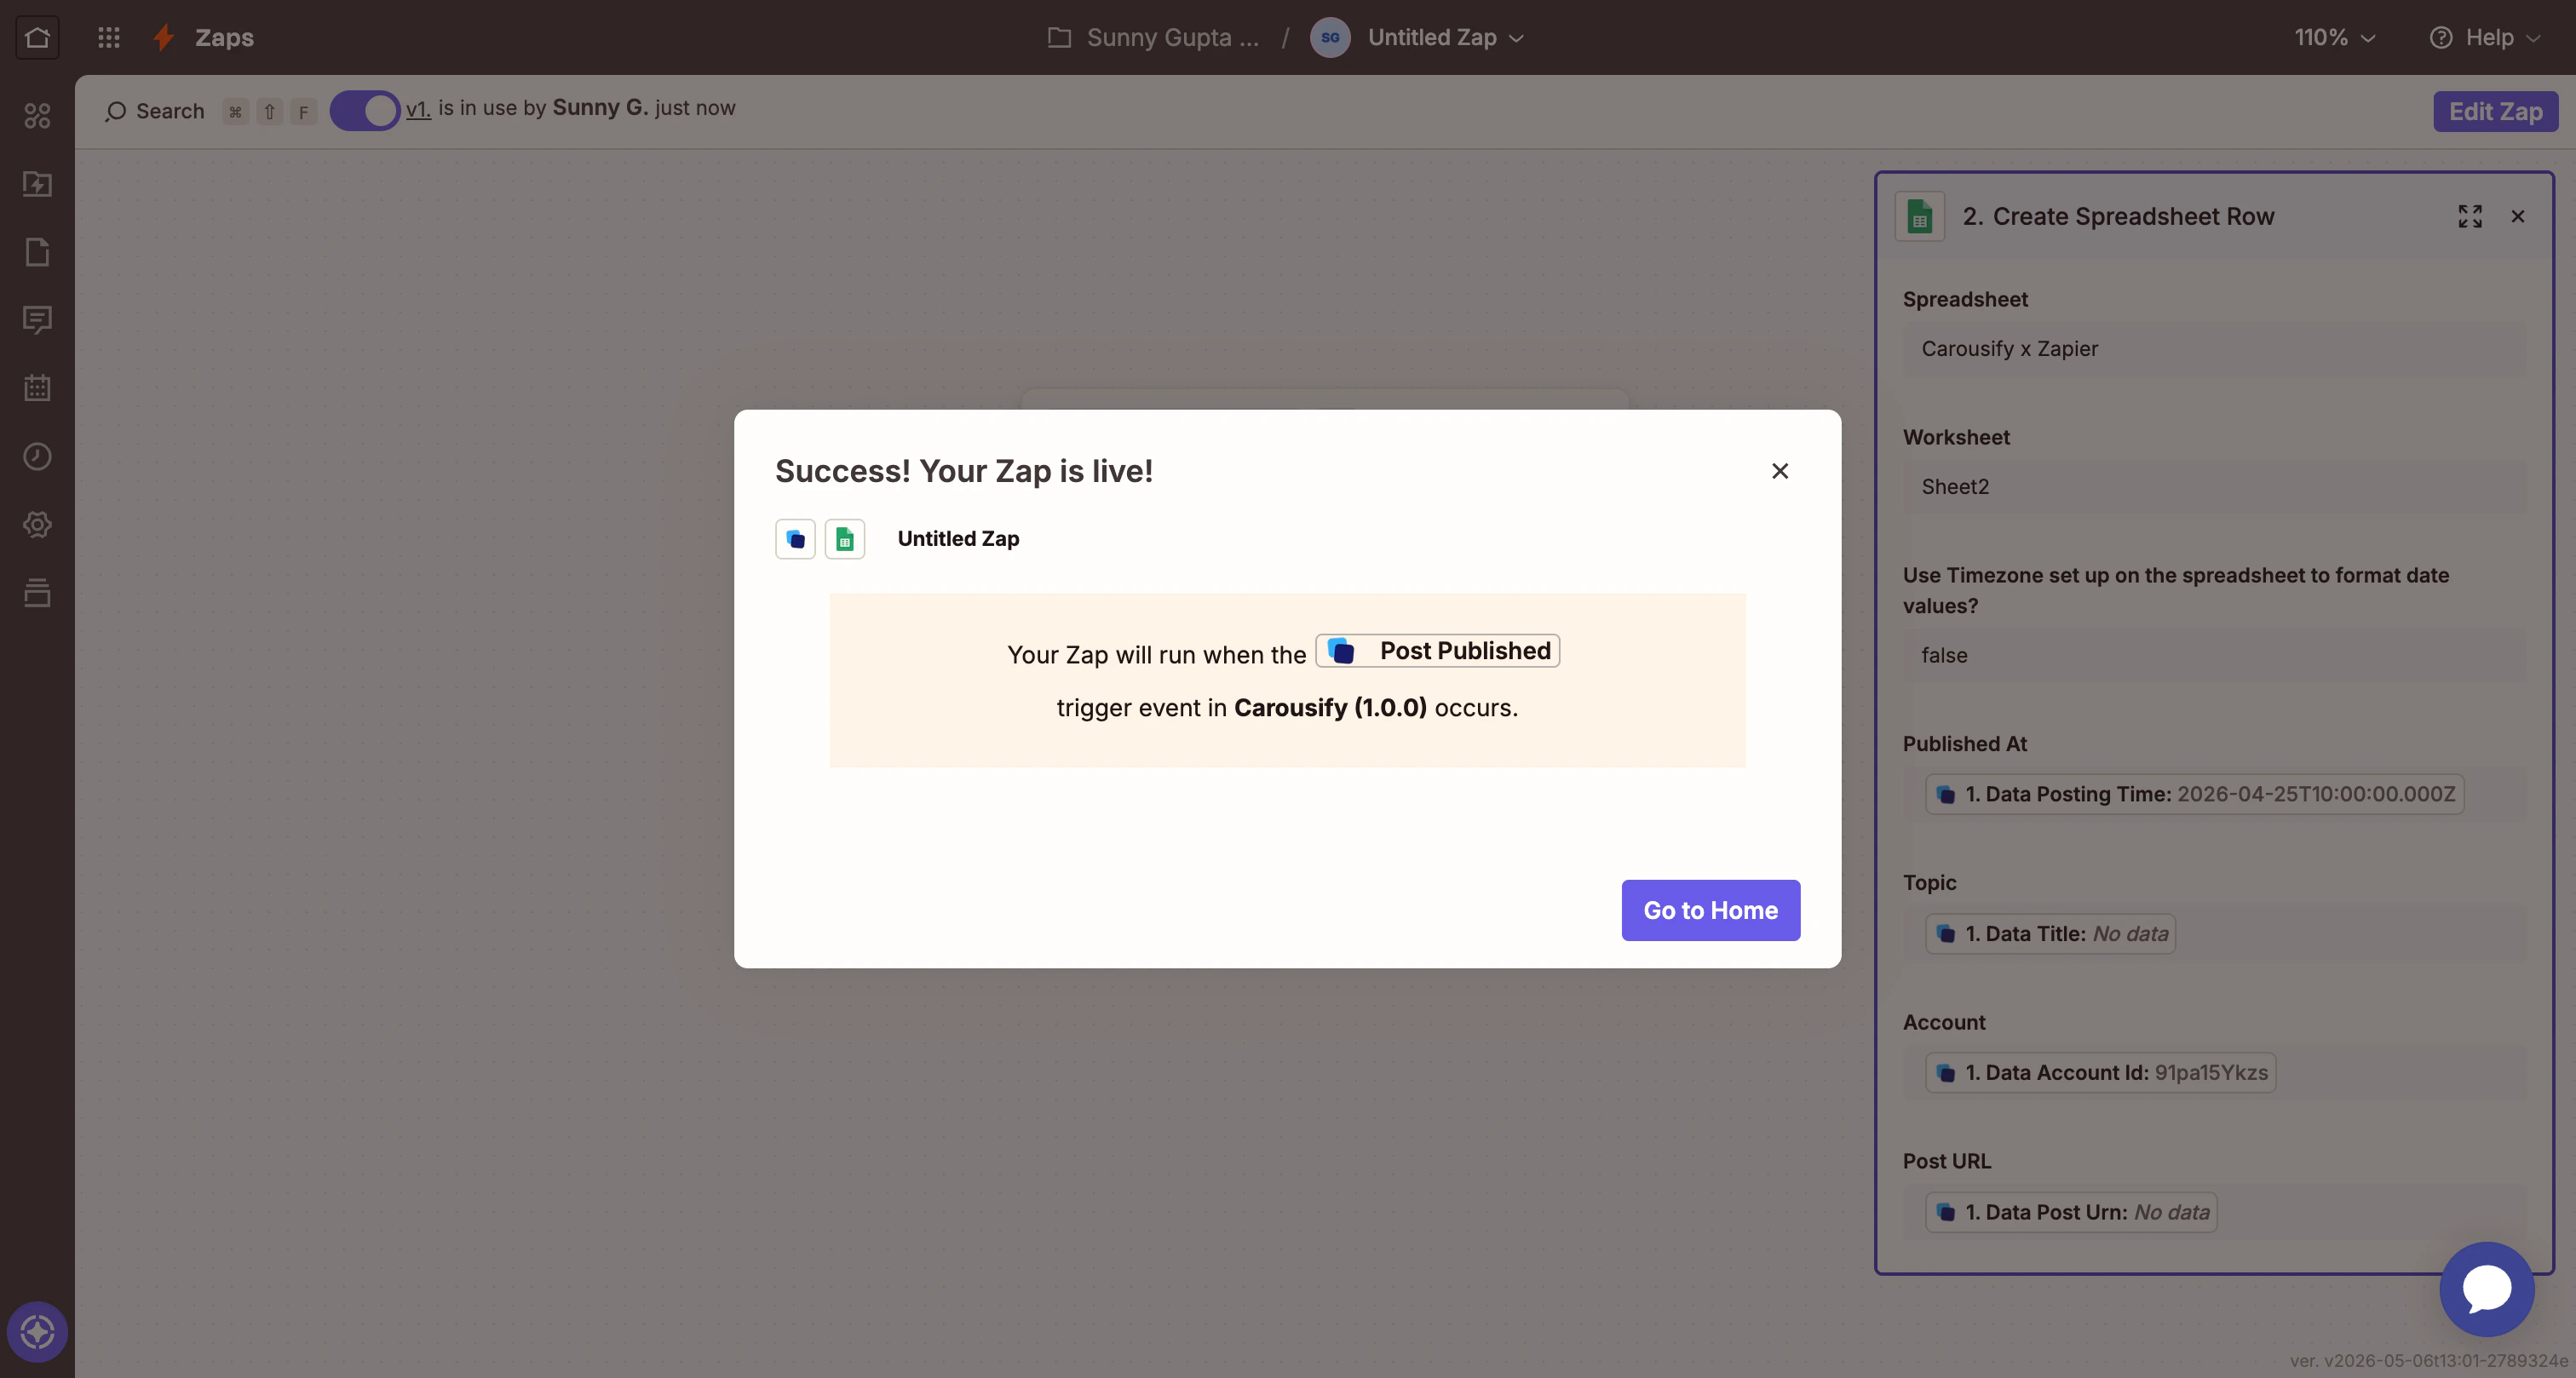
Step 8 — Test and publish
Zapier shows a preview of the exact payload it’ll send to Google Sheets.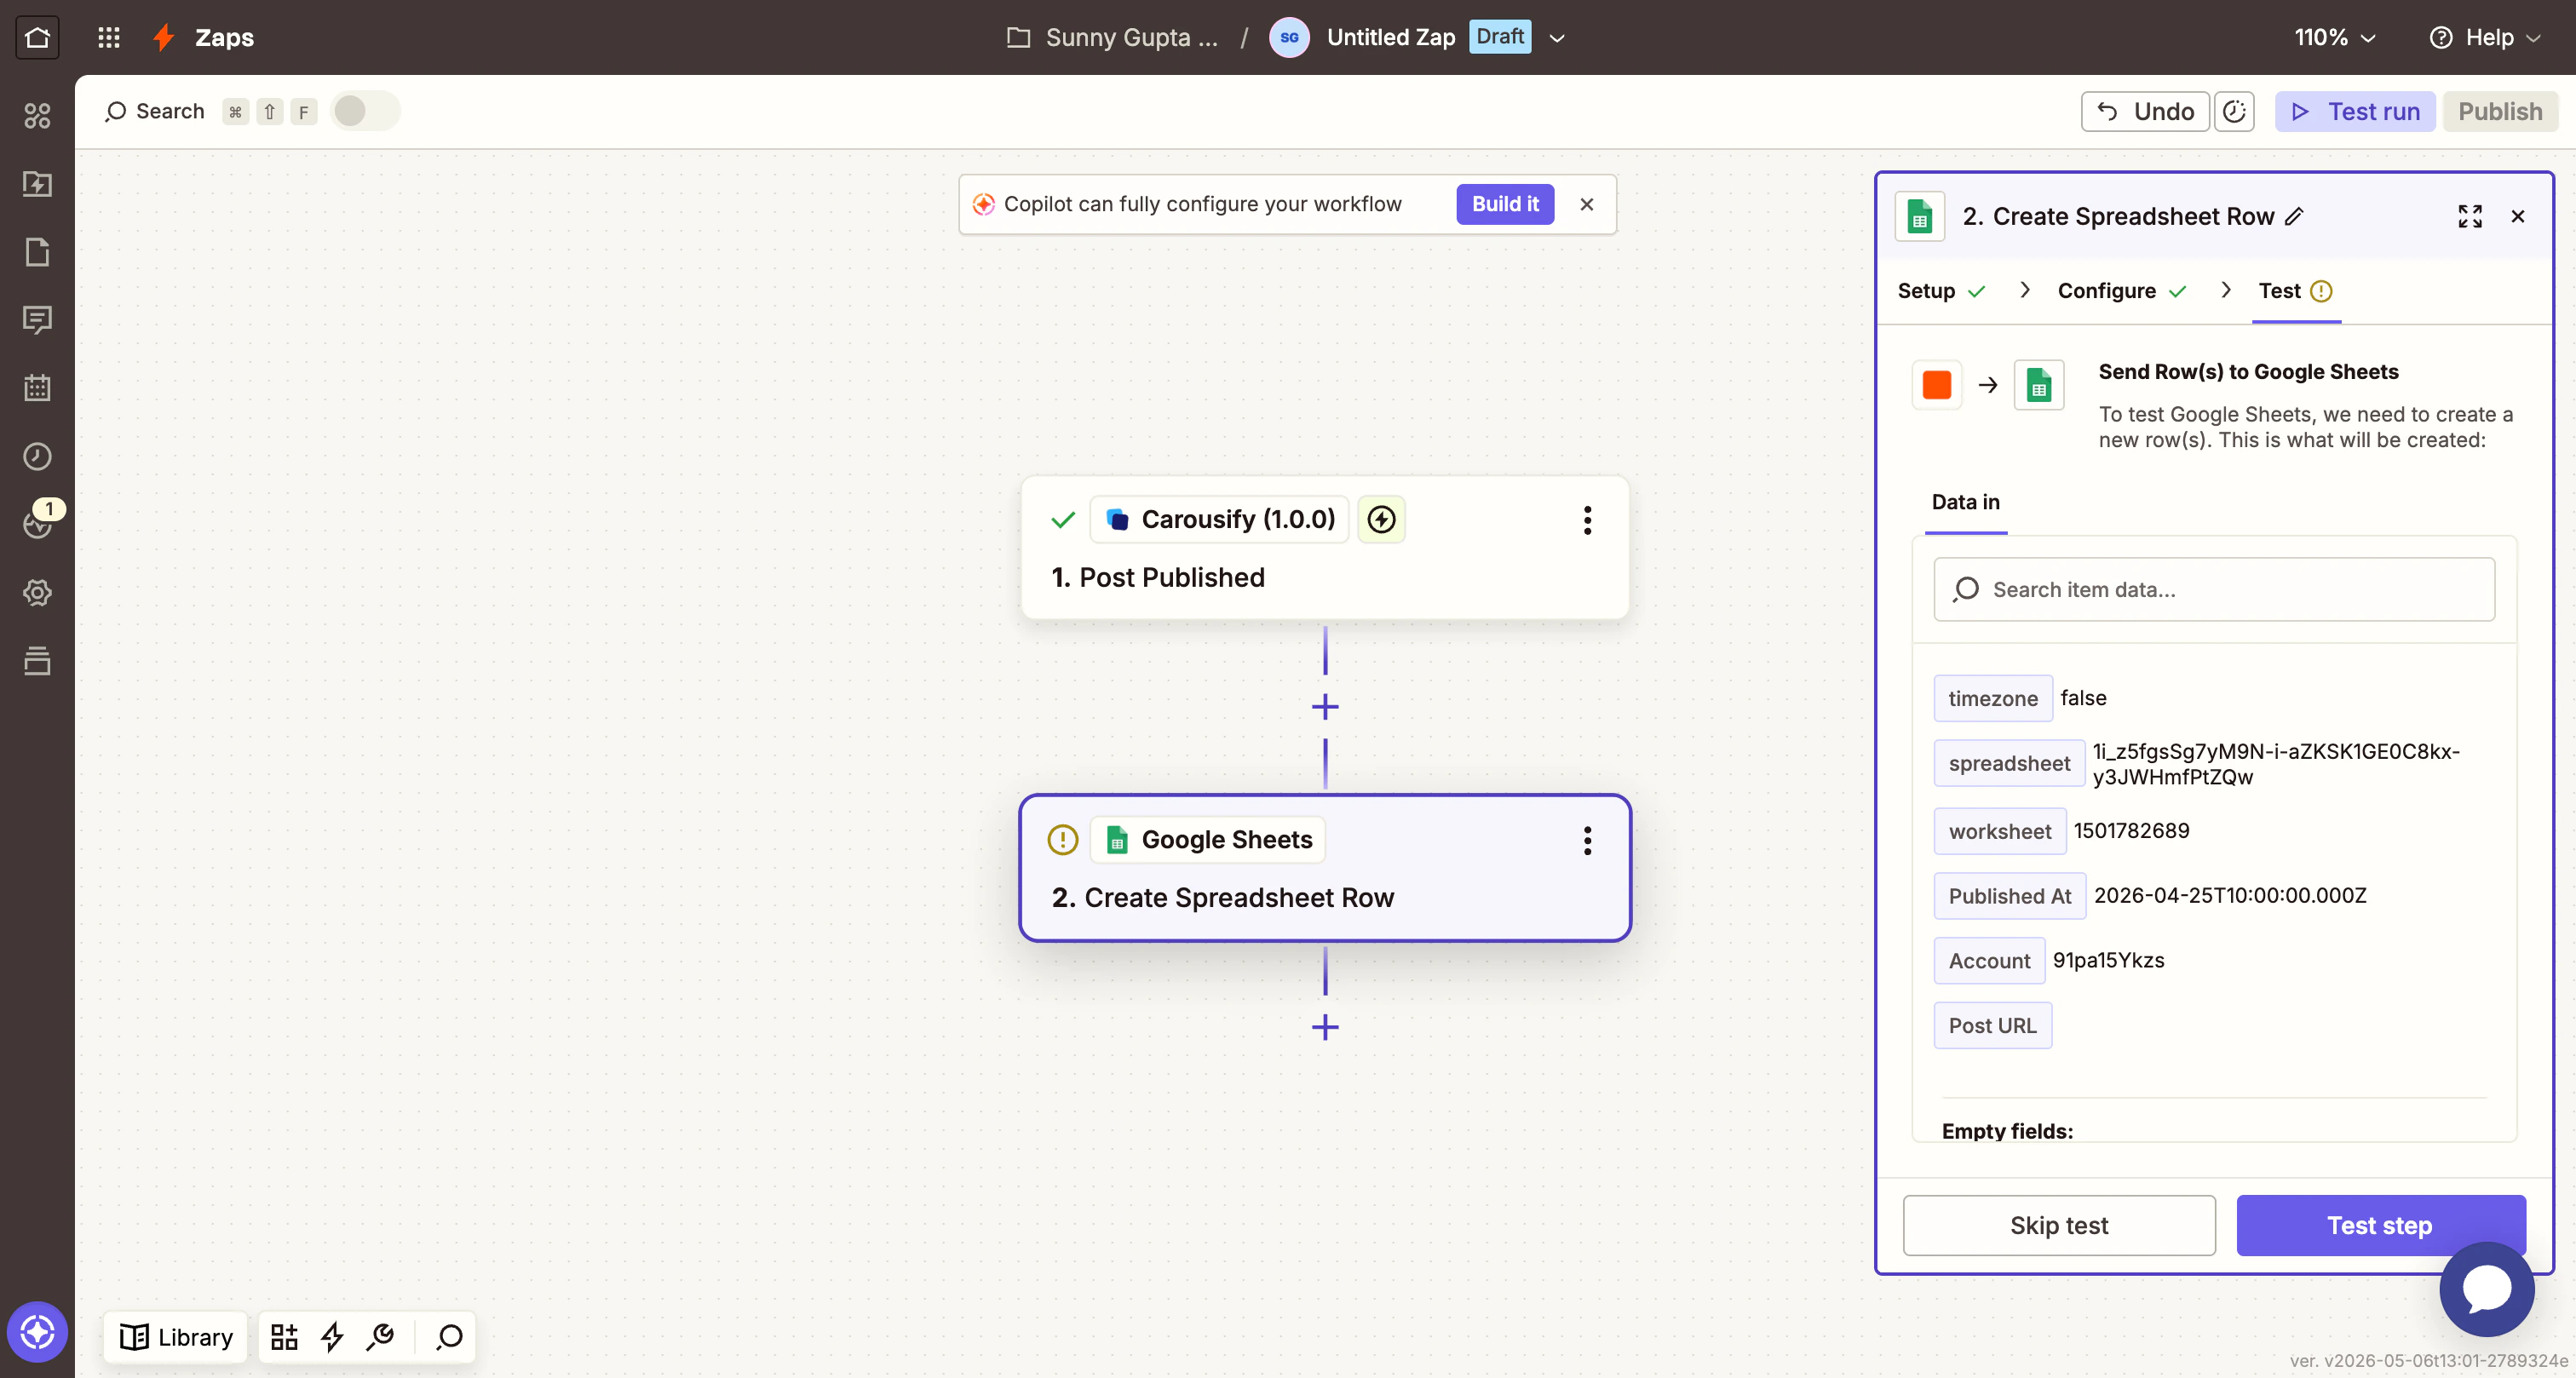
Filtering by account or status
A common follow-up is restricting a Zap to a specific LinkedIn account or only failed posts. Add a Filter by Zapier step between the trigger and the action:- Field:
Data Account IdCondition:(Text) Exactly matchesValue: your vanity, e.g.carousify - Field:
Data StatusCondition:(Text) Exactly matchesValue:failed
Disconnect or rotate the key
To rotate the API key (recommended every 90 days, or whenever someone leaves the team):- In Carousify, open Manage Workspace › Integrations and click Disconnect on the Zapier card. The current key stops working immediately.
- Click Connect again, generate a new key.
- In Zapier, open App connections and click Reconnect on the Carousify entry. Paste the new key.
Troubleshooting
- “API Key Unrecognized” during sign-in. The key was disconnected on the Carousify side, or you copied it with extra whitespace. Generate a fresh key and try again.
- No sample data when testing the trigger. You don’t have any matching events in your account yet — schedule or publish a real post in Carousify and click Test trigger again.
- Published At lands as a number in Sheets. Toggle Use Timezone set up on the spreadsheet to format date values? to True in the Google Sheets action — Zapier will then format
Data Posting Timeas a readable timestamp. - Zap stops firing. Check Zap history in Zapier for the failure reason. Most common causes: the Carousify API key was rotated without updating Zapier, or the underlying LinkedIn account got disconnected.
What’s next
Slack notifications
Same three events delivered straight into a Slack channel without going through Zapier.
Notion scheduling
Schedule posts from a Notion database — no Zapier needed.
Schedule a post
Trigger your first Post Scheduled event and watch the Zap run.
MCP server
For developers who’d rather drive Carousify from Claude or VS Code.